Overview
Social Publishing is part of Marketing Pro Reputation. It turns your completed job photos into ready-to-post social content, so you don't have to comb through jobs and photos by hand to find what's worth sharing. It picks your best photos from a job, writes a caption with AI, and adds your logo automatically. Review, edit, and publish across Facebook, Instagram, and Google My Business (Google Business Profile) in one step, without leaving ServiceTitan.
Make sure you're viewing the correct Marketing Pro content This article covers Social Publishing, part of Marketing Pro Reputation, available to accounts with Listings Management enabled. If you don't see Social Publishing under Reputation, contact your Customer Success Manager (CSM) or Pro Account Manager (PAM).
Who uses this feature
Marketing managers, business owners, and other marketers on your team
Primarily benefits Residential Service and Replacement business types and Commercial Service and Replacement business types
Applies to all trades
Feature configuration
To get started with Marketing Pro, request a demo on our Pro Products page, or reach out to your Customer Success Manager (CSM) or Pro Account Manager (PAM).
Social Publishing requires Listings Management to be enabled and at least one platform connected: Facebook, Instagram, or Google My Business. Instagram connects through your Facebook account. For more, see Create Locations in Reputation Management.
To turn on Listings Management for a location, go to Marketing > Reputation > Locations, click the ⋮ menu next to the location, click Edit location, then select Activate Listings Management for this location.
If your account doesn't meet these requirements, Social Publishing won't be available. Contact your CSM or PAM for help getting set up.
Things to know
Social Publishing only surfaces photos from completed jobs. It writes captions from the photos and the job's details: the job summary, invoice summary, and technician bios.
Each post candidate includes 3 photos, chosen automatically by image quality: 1 large photo and 2 thumbnails.
Posts you publish through Social Publishing appear in the Posted tab. Posts made before this feature (through the earlier version of social posting) don't appear here.
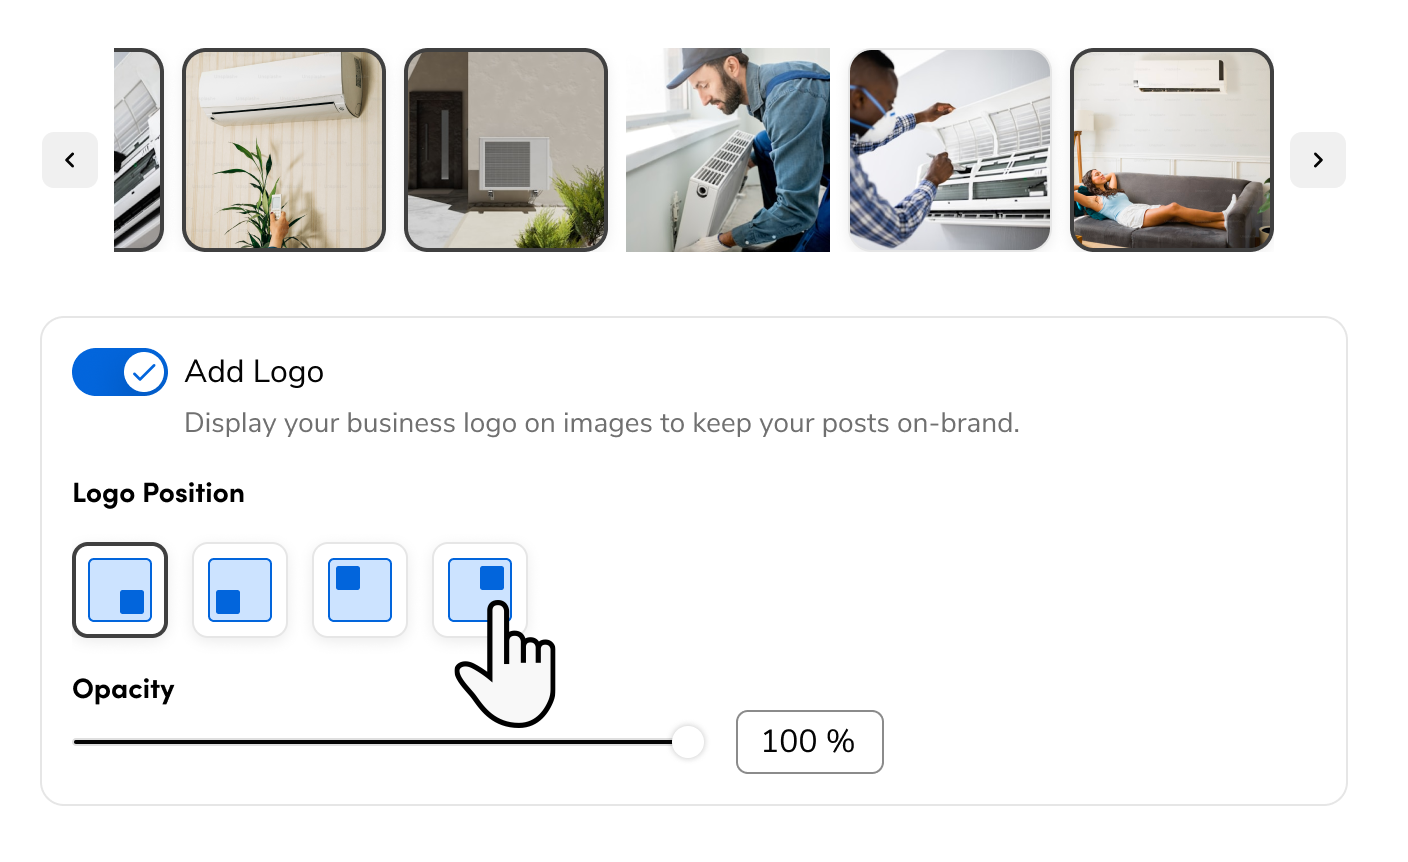
Logo position and opacity are set per post, not account-wide — you can adjust them differently for each image.
You can also build a post from scratch in the Gallery tab, without starting from a specific job.
If your business has more than one location, you choose the location in Posting On before you pick platforms.
Best practices
Review AI-generated captions before publishing. Use Quick Actions to change the tone, length, or highlights, or enter a Custom Prompt if the caption doesn't match how you want to represent a job.
Upload your logo in Marketing Pro brand settings and turn on Always add logo so it's added to new posts automatically — you can still turn it off per post.
Use the Technician, Business Unit, and Job ID filters on the Marketing Ready tab to find recent jobs worth promoting, especially after a high-visibility or high-value job.
Use cases
You're not currently posting on social media at all. Social Publishing gives you a ready-made way to start, without spending hours combing through job photos yourself.
You already post on social media but want more volume. Use Social Publishing to supplement your existing posts and keep your channels more active.
The Social Publishing page
Social Publishing lives under Marketing > Reputation > Social Publishing and has 4 tabs:
Marketing Ready (default view): Post candidates generated automatically from your completed jobs, sorted by Created Date, Newest to Oldest. Use the Sort By control or the Technician, Business Unit, and Job ID filters to narrow the list, or use search.
Gallery: Compose a post freely from your marketing assets, without being tied to a specific job.
Posted: Everything you've published through Social Publishing, with a status badge on each post.
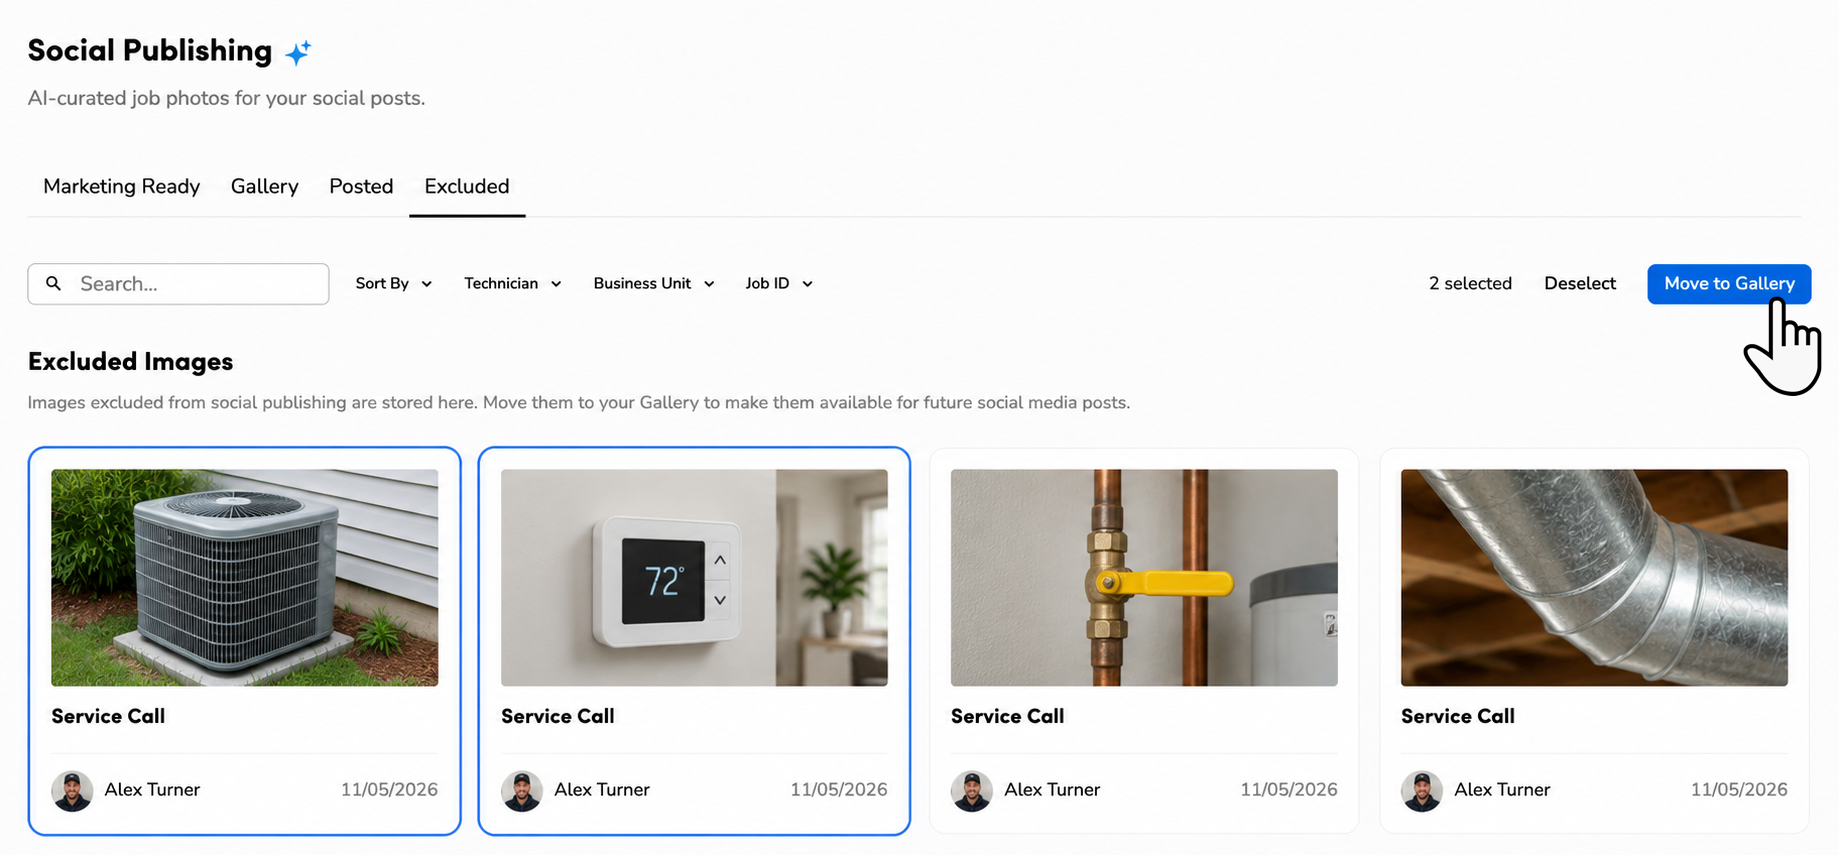
Excluded: Photos or candidates you've removed from the Marketing Ready list. You can move them to the Gallery if you want to use them later.
Once you publish a post from a Marketing Ready candidate, it drops off the Marketing Ready list and moves to Posted.
Connect Instagram
Instagram isn't a separate listing in Reputation. It connects through your Facebook account.
Make sure your Instagram account is a Business or Creator account linked to your Facebook Business Page. Personal accounts won't work. You link the accounts in Meta Business Suite or your Facebook Page settings.
In ServiceTitan, go to Reputation > Locations and connect Facebook. When asked, grant permissions for both your Facebook Page and the linked Instagram account.
After Facebook is connected, Instagram becomes available in Posting On when you create a post.
Create a post from a completed job
Go to the navigation bar and click Marketing.
In the side menu, go to Reputation > Social Publishing.
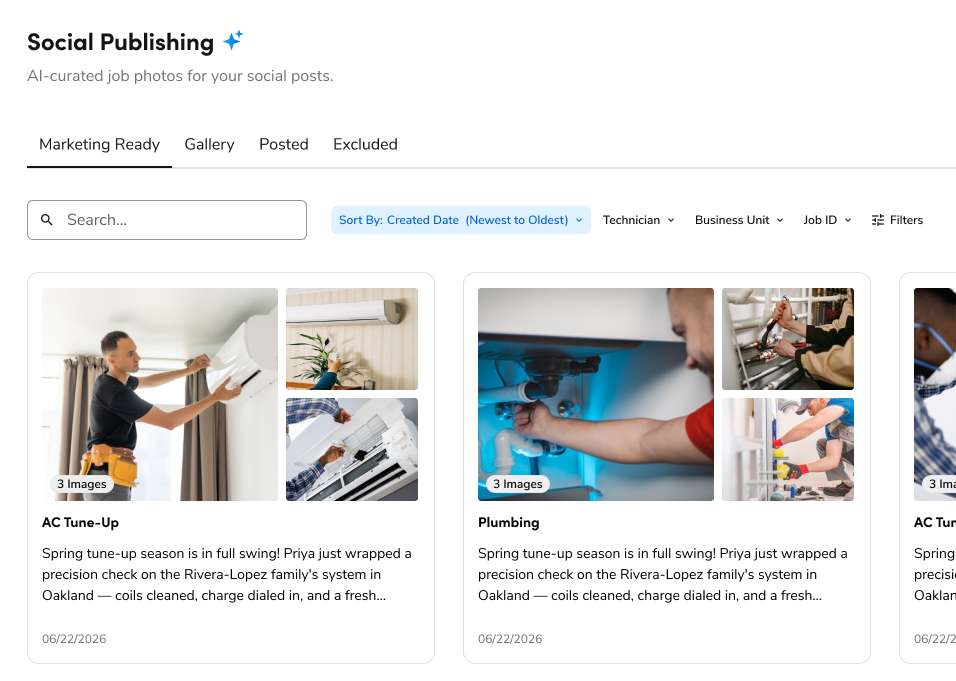
On the Marketing Ready tab, find the job you want to promote. Use Sort By or the Technician, Business Unit, or Job ID filters to help narrow the list.

Click the post candidate to open the Create Social Media Post window. Review the 3 selected photos and the AI-generated caption.
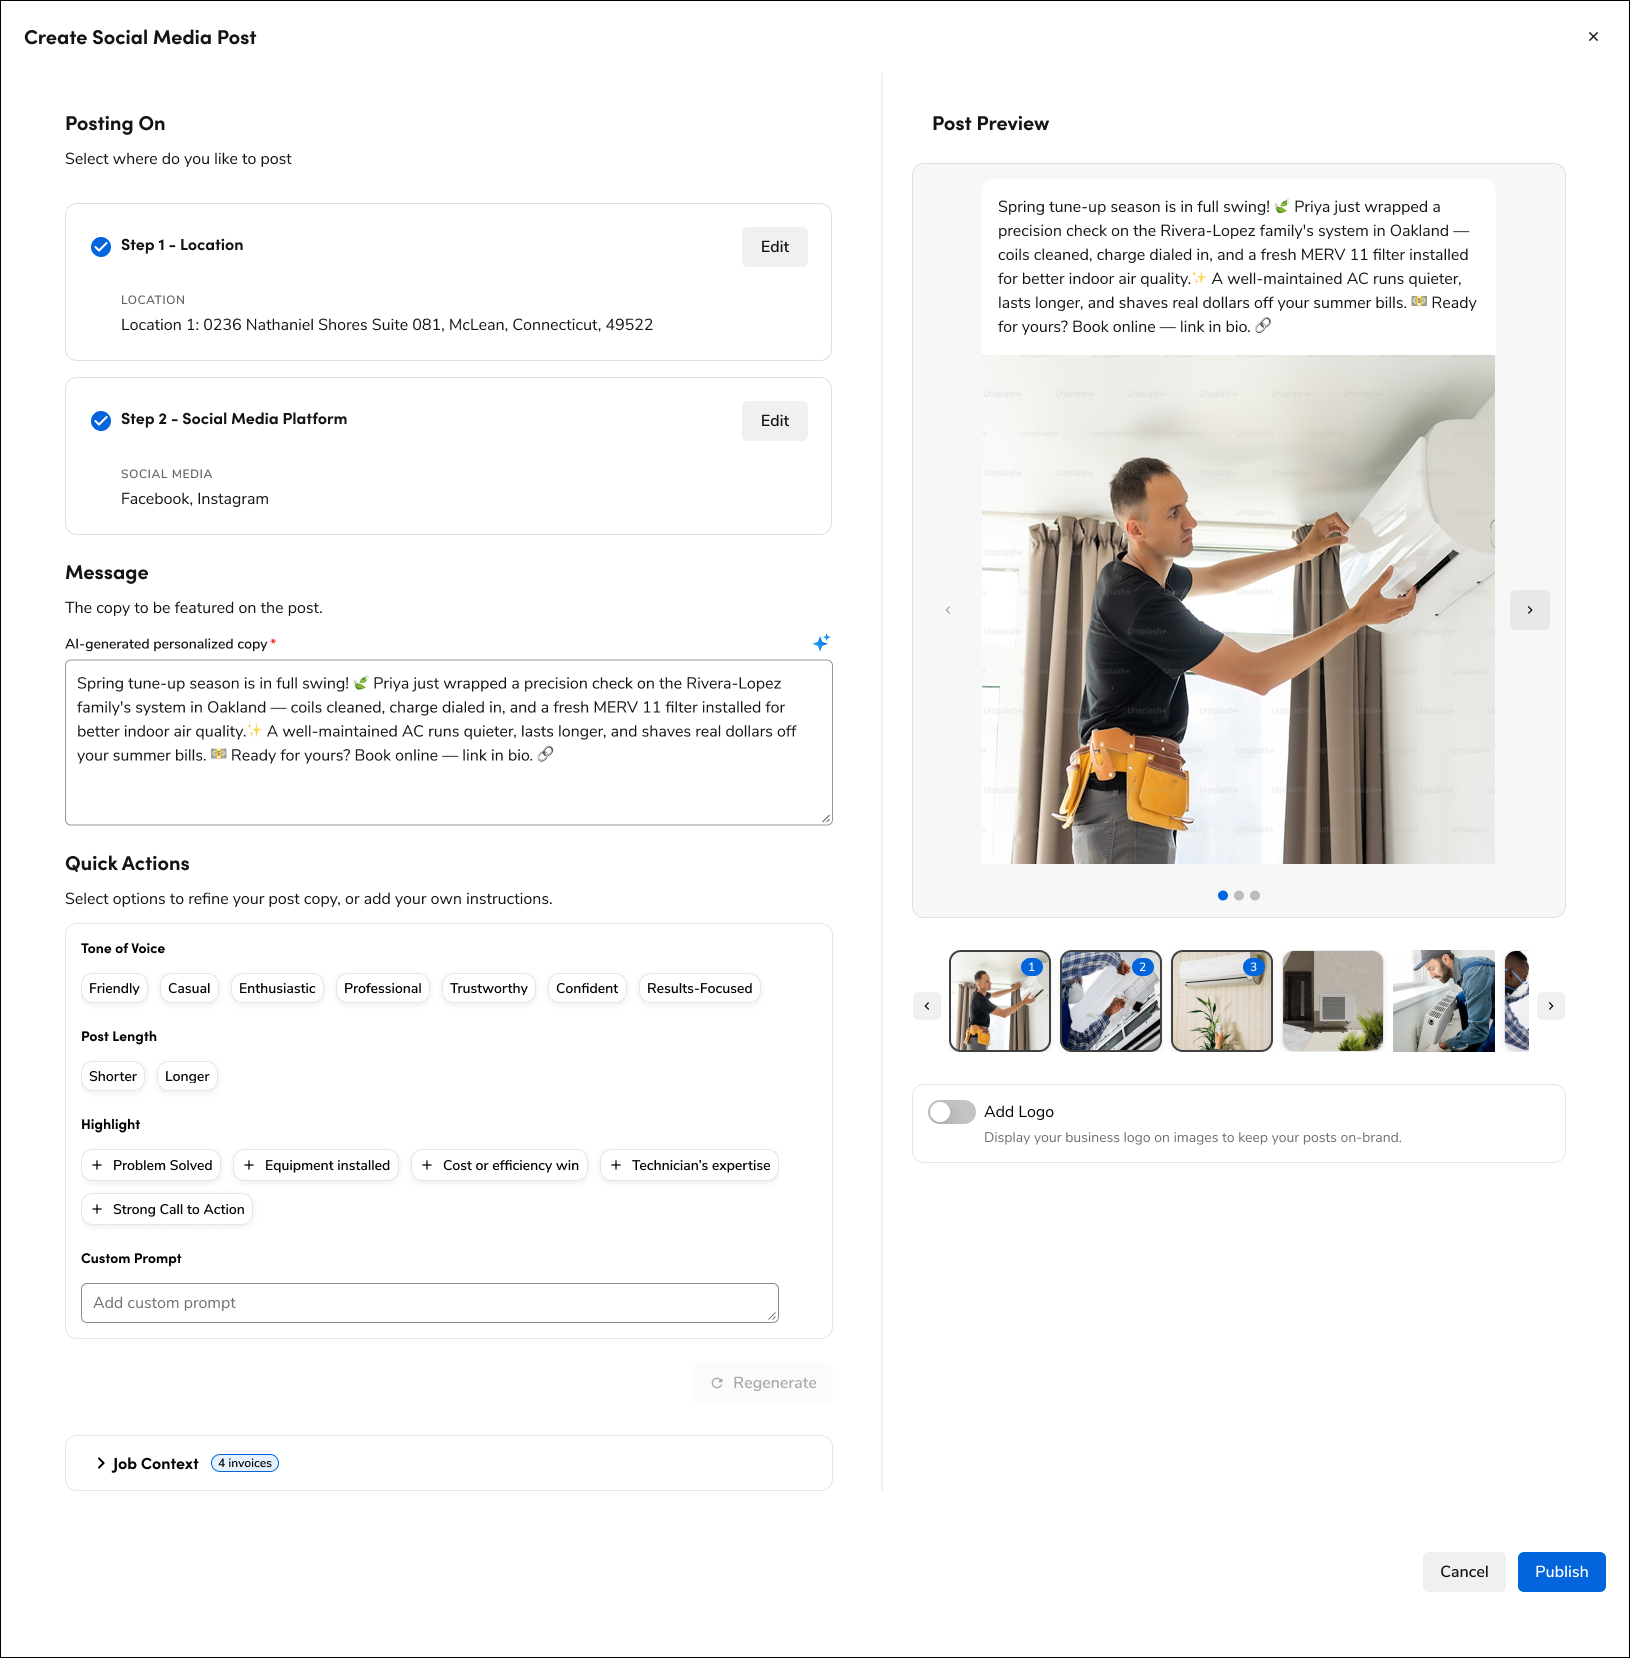
Review the caption in AI-generated personalized copy. You can edit it directly, up to 1,500 characters.
(Optional) To have the AI rewrite the caption, choose options under Quick Actions: Tone of Voice, Post Length, or Highlight, or enter a Custom Prompt. Then click Regenerate.
Note: Regenerate is disabled until you choose a quick action or enter a custom prompt.
(Optional) Turn on Add Logo, and adjust its position and opacity for this post. For more, see Add your logo to a post.
(Optional) Edit any of the photos. In Post Preview, hover over the photo and click Edit Image. For more, see Edit an image with AI.
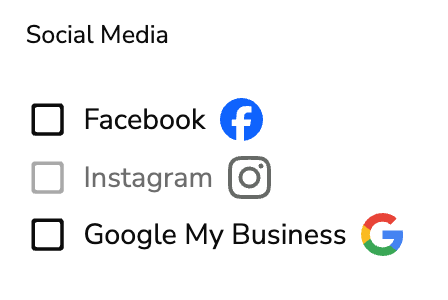
In Posting On, select the checkbox for each platform you want to publish to: Facebook, Instagram, or Google My Business.
Multiple locations: If your business has more than one location, Posting On shows two steps. In Step 1 - Location, select the location from the dropdown. In Step 2 - Social Media Platform, select each platform. To change a choice, click Edit next to that step.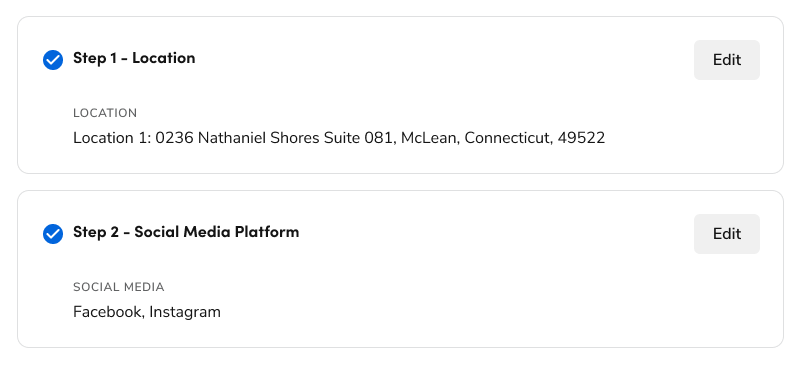
Note: If Instagram is greyed out, your Instagram account isn't linked to your Facebook Business Page. See Connect Instagram.
Click Publish.
Create a post from the Gallery
Use the Gallery when you want to build a post without starting from a specific job — for example, combining photos from more than one job or from an upload.
Go to the navigation bar and click Marketing.
In the side menu, go to Reputation > Social Publishing > Gallery.
Select the photos you want to include.
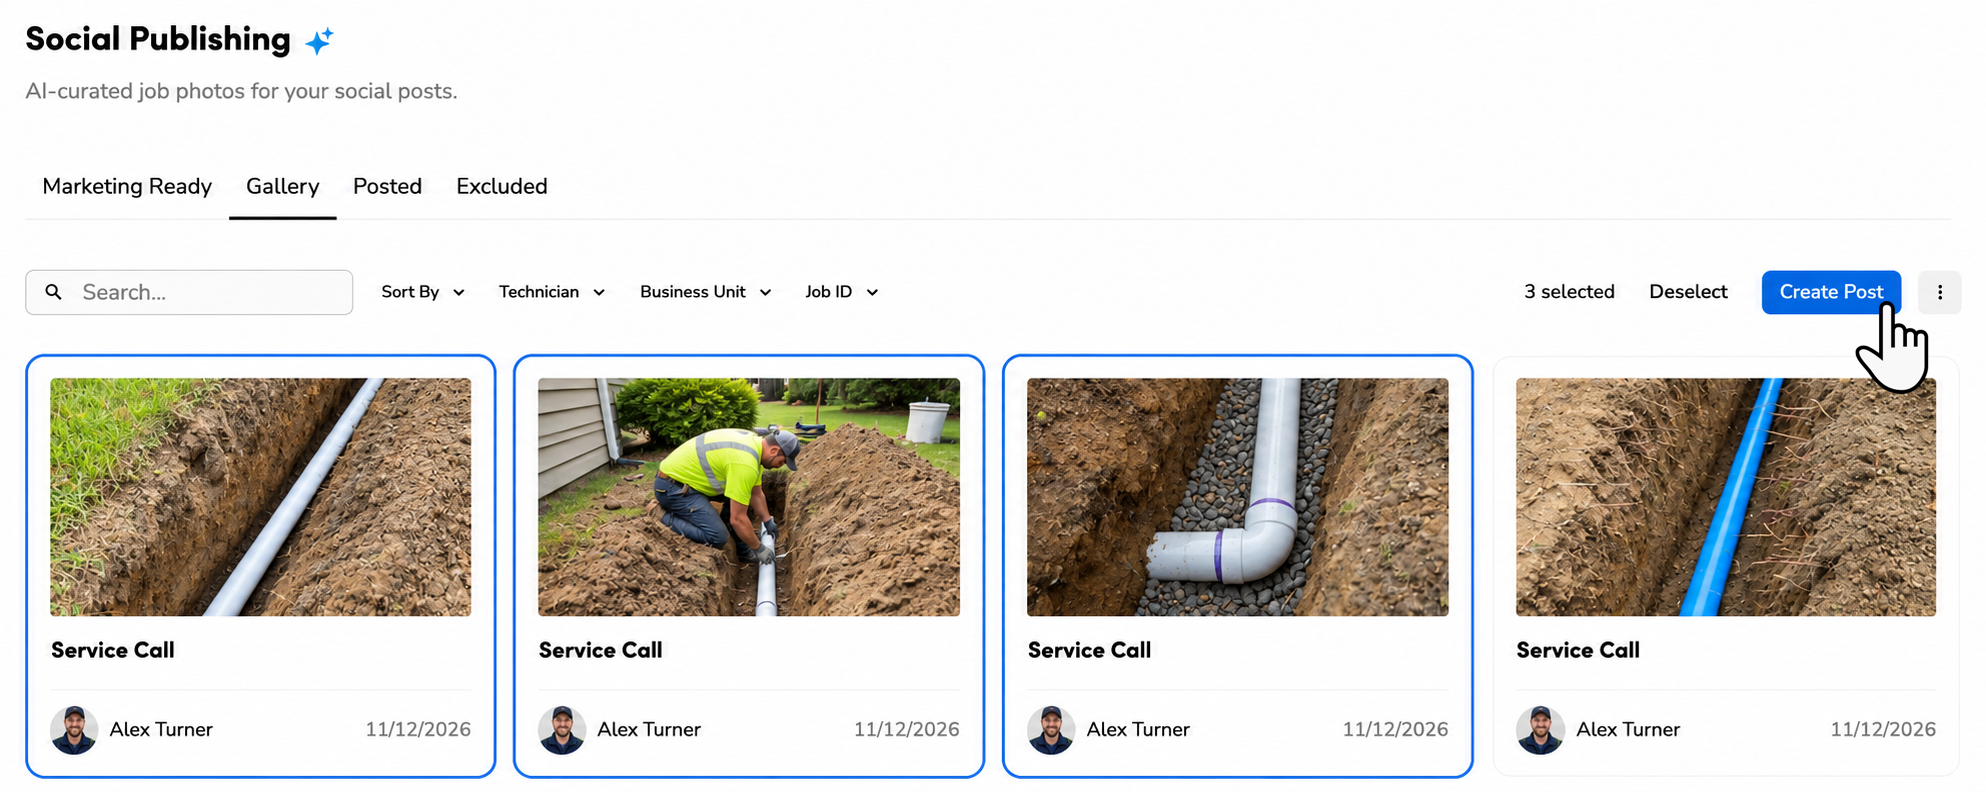
Click Create Post. The Create Social Media Post window opens.
Review or edit the caption, logo, and images as needed.
In Posting On, select each platform you want to publish to: Facebook, Instagram, or Google My Business. If your business has more than one location, select the location first. Then click Publish.
Edit an image with AI
You can regenerate any photo in a post using AI, without leaving the Create Social Media Post window.
In the Create Social Media Post window, go to Post Preview, hover over the photo you want to change, and click Edit Image.
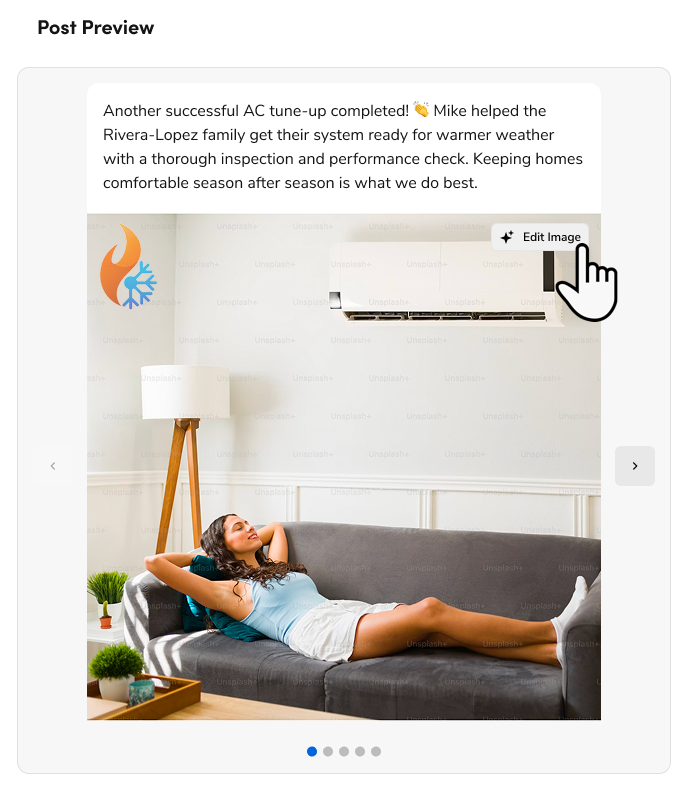
In the window that opens, enter a text prompt describing the change you want.
Click Generate.
Note: Generate is disabled until you enter a prompt.
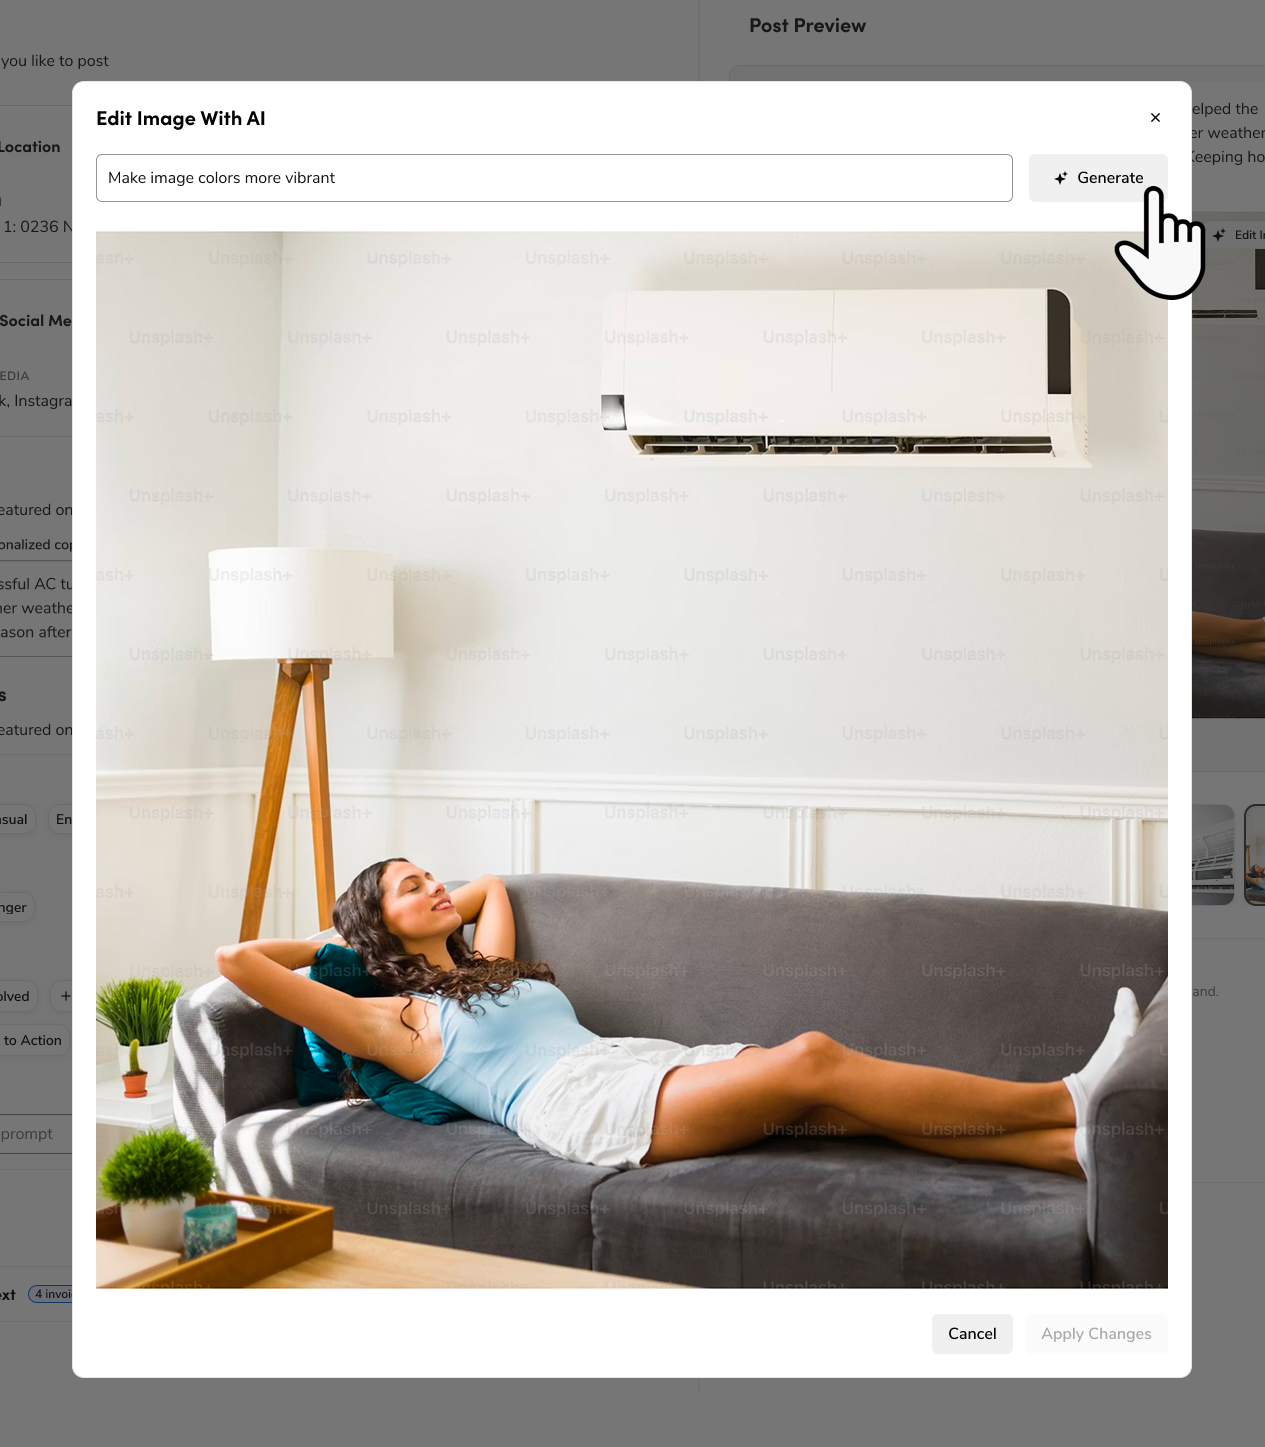
Review the result. Click Apply Changes to add it to the post as a new photo — your original photo is kept.
Note: Apply Changes is disabled until a result is generated.
Click Cancel at any point to discard your changes and keep the original photo.
Add your logo to a post
Upload your logo once in Marketing Pro Brand Settings.
In the Create Social Media Post window, turn on Add Logo for this post.
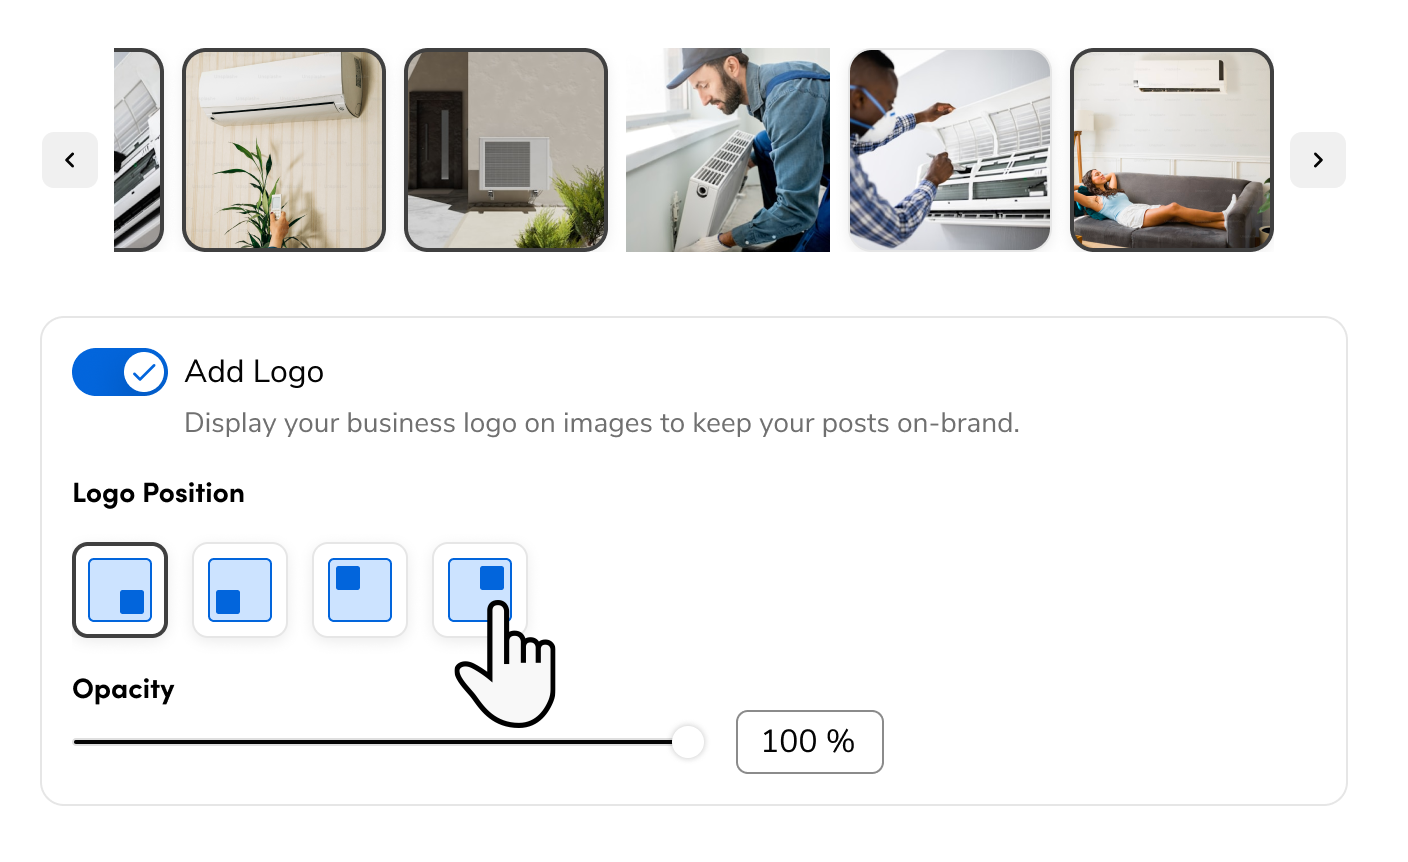
Adjust the logo's position and opacity for this specific post.
Tip: Turn on Always add logo in your Social Publishing settings so new posts include your logo by default. You can still turn it off for individual posts.
View and manage published posts
Go to the navigation bar and click Marketing.
In the side menu, go to Reputation > Social Publishing > Posted.
Review the status badge on each post to confirm it was published successfully.
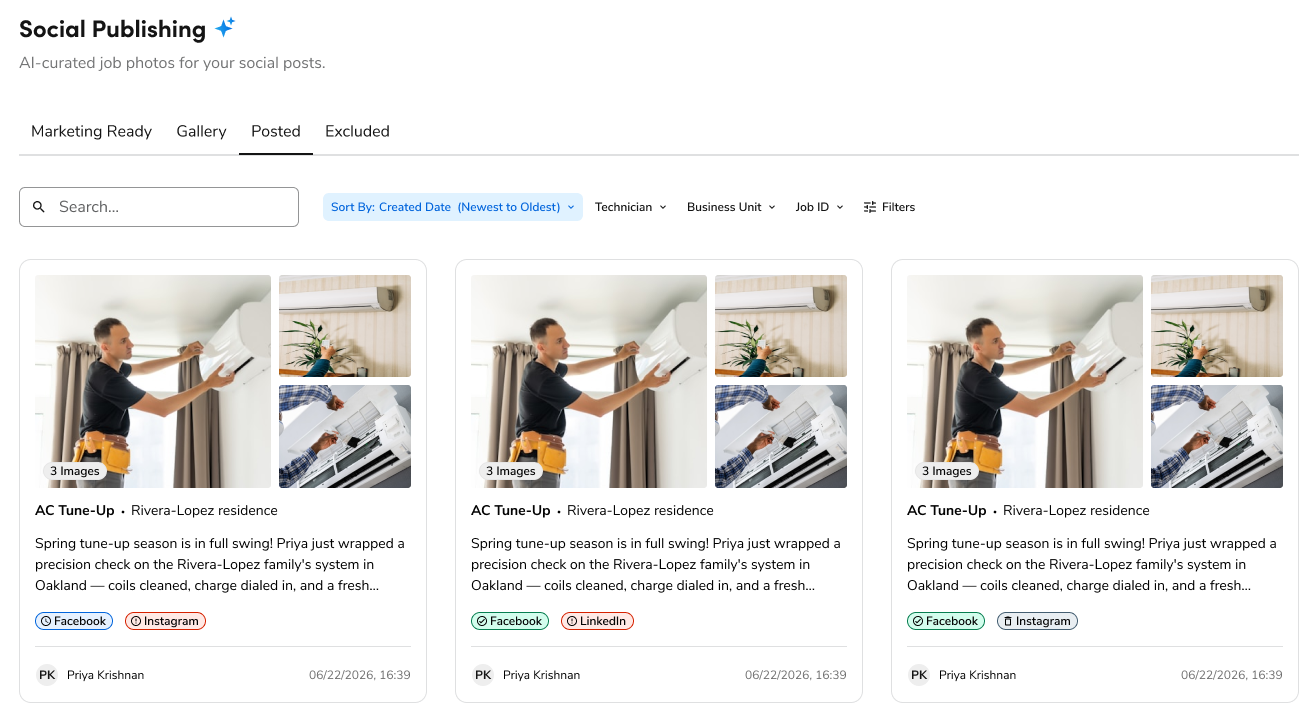
Note: Only posts created through Social Publishing appear here. Posts made through the previous version of social posting aren't included.
Exclude photos
If a photo in the Gallery isn't a good fit for social media, you can exclude it so it stops showing up.
Go to the navigation bar and click Marketing.
In the side menu, go to Reputation > Social Publishing > Gallery.
Select the photos you want to exclude. Then click ⋮ next to Create Post, and click Exclude Images.
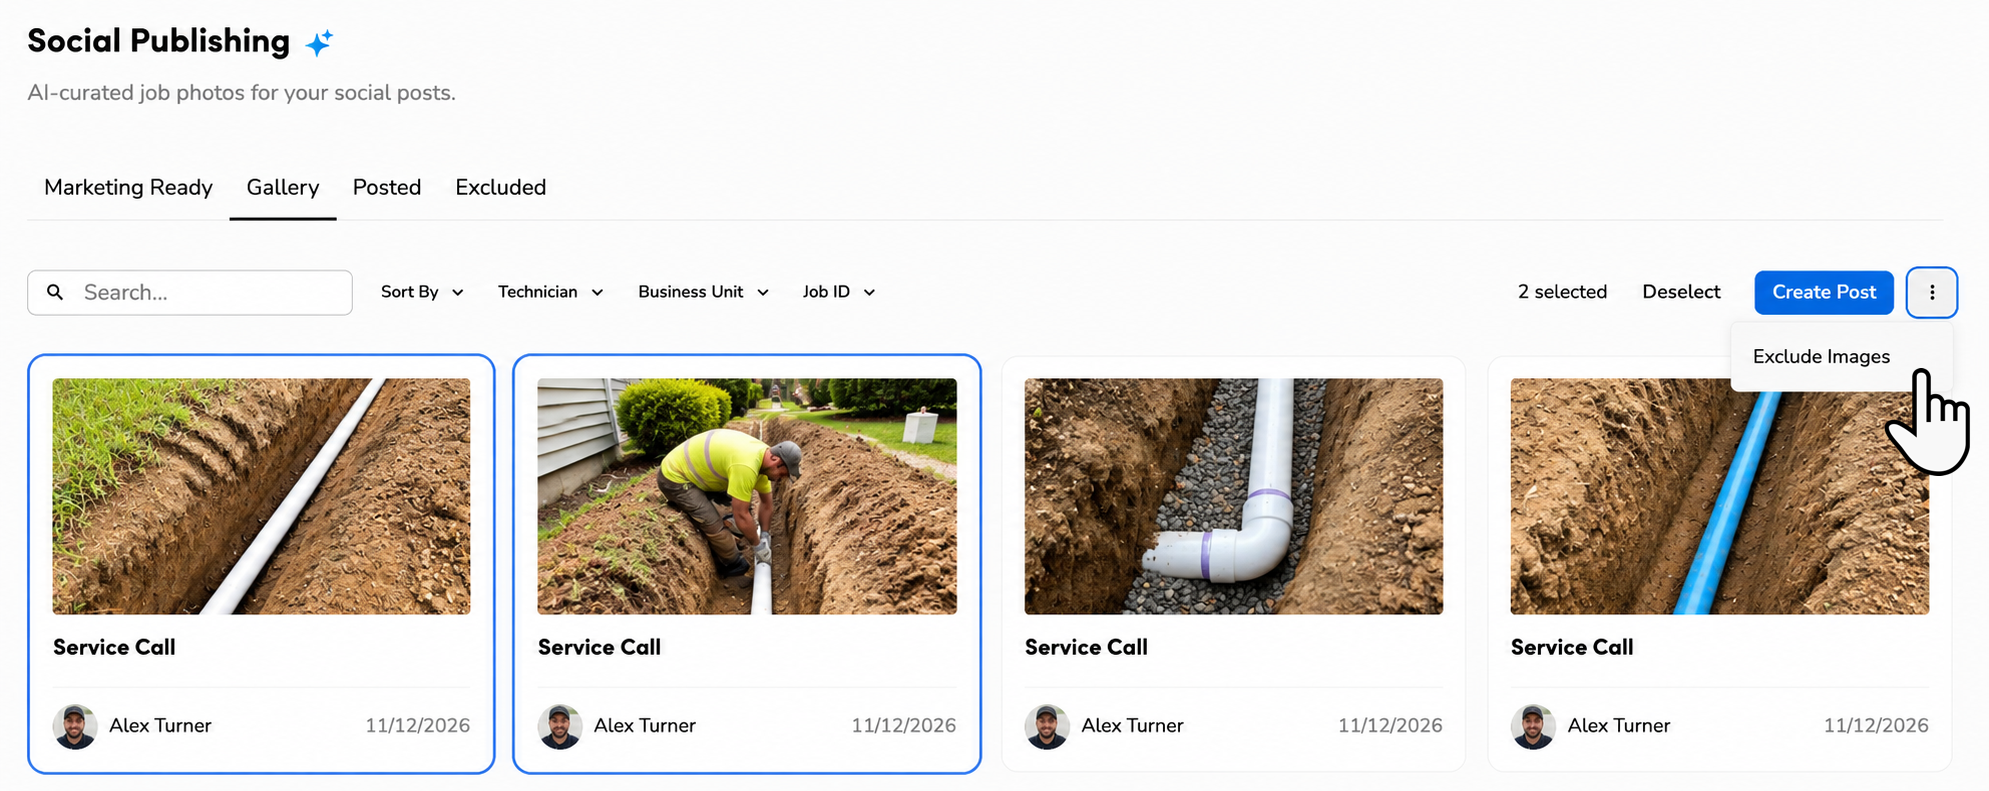
To review them later, go to the Excluded tab.
Move an excluded photo back to the Gallery
If you change your mind about an excluded photo or candidate, you can move it to the Gallery to use it in a future post.
Go to the navigation bar and click Marketing.
In the side menu, go to Reputation > Social Publishing > Excluded.
Select the photo or candidate you want to bring back.
Click Move to Gallery.
FAQ
Which platforms can I publish to with Social Publishing?
Facebook, Instagram, and Google My Business (Google Business Profile).
Where does the AI caption come from?
Captions are generated from the photos and the job's details: the job summary, invoice summary, and technician bios. Job notes and technician role aren't used.
Can I combine photos from more than one job into a single post?
Not from the Marketing Ready tab — each candidate there is based on a single completed job. Use the Gallery to combine photos from multiple jobs into one post.
Will my old social posts show up in the new Posted tab?
No. Posted only shows posts created through this version of Social Publishing.
Can I get back a photo or candidate I excluded?
Yes. Go to the Excluded tab, select it, and click Move to Gallery. From there, you can use it to build a post.
Why don't I see Social Publishing in my Marketing menu?
Social Publishing requires Listings Management to be enabled and at least one platform connected: Facebook, Instagram, or Google My Business. Contact your CSM or PAM to get set up.