Overview
This guide covers the Customer Payments and Deposits modules in the Transaction Hub, which you can use to apply payments, review them, and take actions without having to leave the Accounting tab.
Who uses this feature
Administrators, office employees, managers, accountants, and bookkeepers
Applies to all business types
Applies to all trades
Feature configuration
Account configuration is required to use this feature. Please contact Technical Support for details.
Accounting and email permissions are required to use this feature. Please contact the account administrator on your team.
Things to know
The default tab for the Customer Payments module is Payment Status.
Each tab’s list can be filtered by clicking the
 icon.
Filters and column settings are saved on a per user basis.
Overview
The Customer Payments module has four tabs:
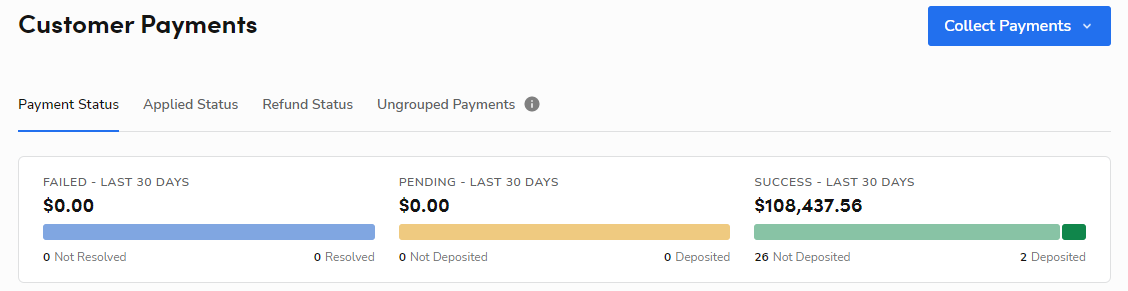
Payment Status
Sort your payments with three payment status groupings, Failed - Last 30 Days, Pending - Last 30 Days, and Success - Last 30 Days. You can quickly view recent credit card and ACH charges to ensure they’re being successfully processed.
Note: If you are not using ServiceTitan Payments, all payments are grouped as Successful.
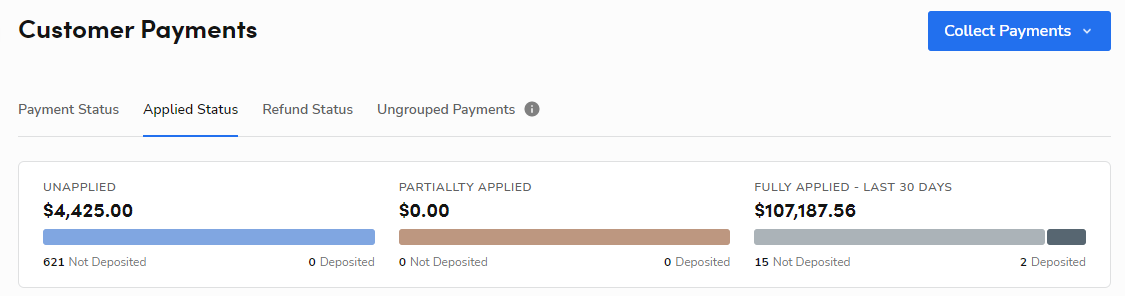
Applied Status
Sort your payments by three applied status groupings, Unapplied, Partially Applied, and Fully Applied - Last 30 Days. Track which payment credits are still attached to customer profiles and which ones are attached to invoices. For more information, see Apply available credit to an invoice.
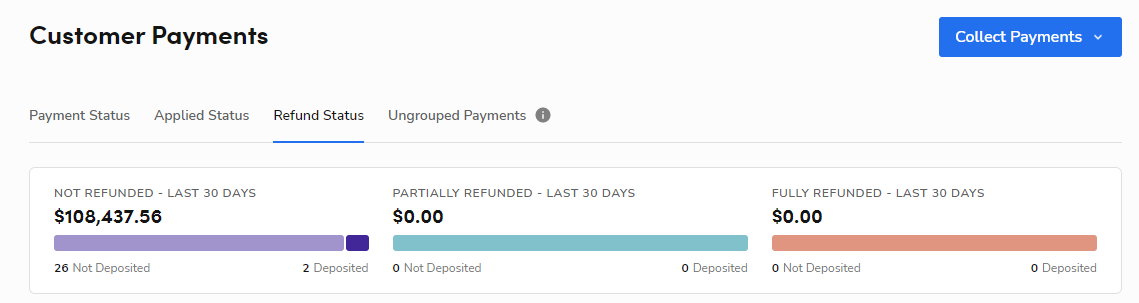
Refund Status
Sort your payments by three refund status groupings, Not Refunded - Last 30 Days, Partially Refunded - Last 30 Days, and Fully Refunded - Last 30 Days. Quickly view recent credit card and ACH refunds to ensure they’re being issued correctly. For more information, see Refund payment applied to an invoice.
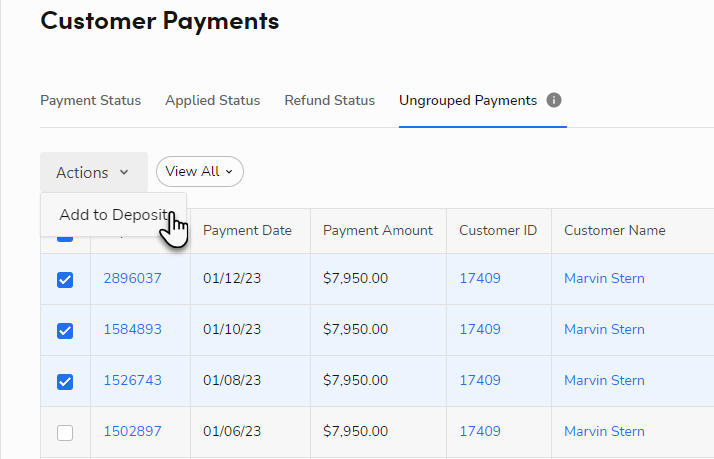
Ungrouped Payments
View all your ungrouped payments at a glance. These are successful payments that still need to be added to a Bank Deposit.
Bank Deposits
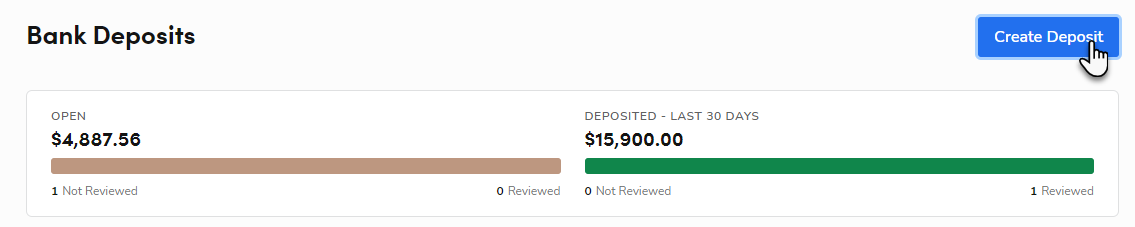
The Bank Deposits module is a single tab with two groupings, Open and Deposited - Last 30 Days. Open means deposits that have not been finalized and can still have more payments added to them.

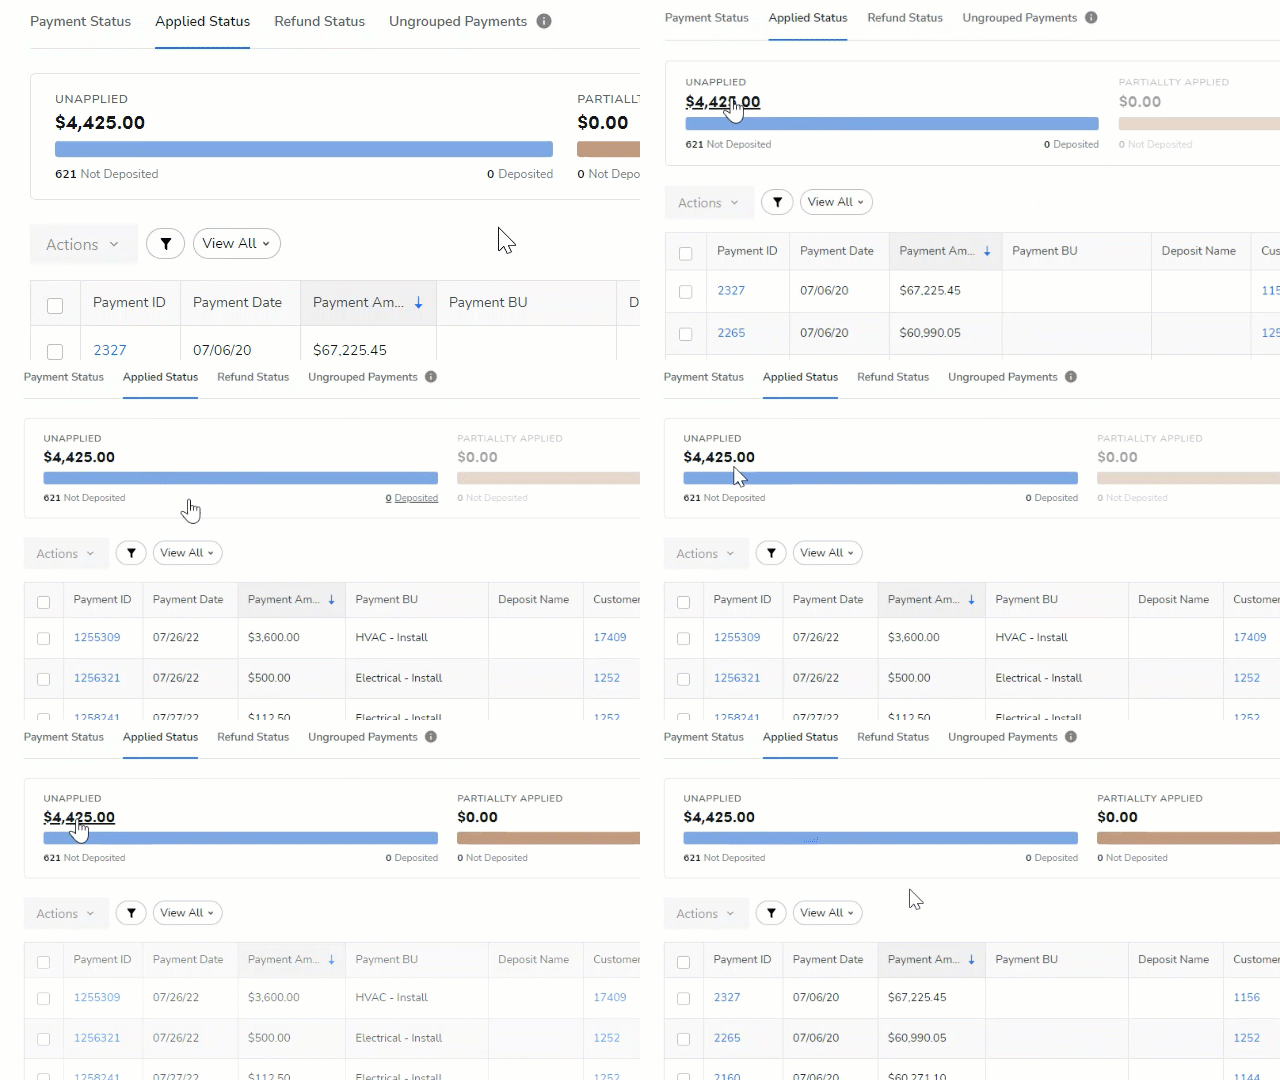
To filter a payments/deposits list by a grouping, like Unapplied for example, click the dollar amount under the grouping’s title. To ungroup it, click the dollar amount again.
Tip: You can also filter a list by Not Deposited/Deposited, Not Reviewed/Reviewed, and Not Resolved/Resolved in the same way.
Create a bank account for bank deposits
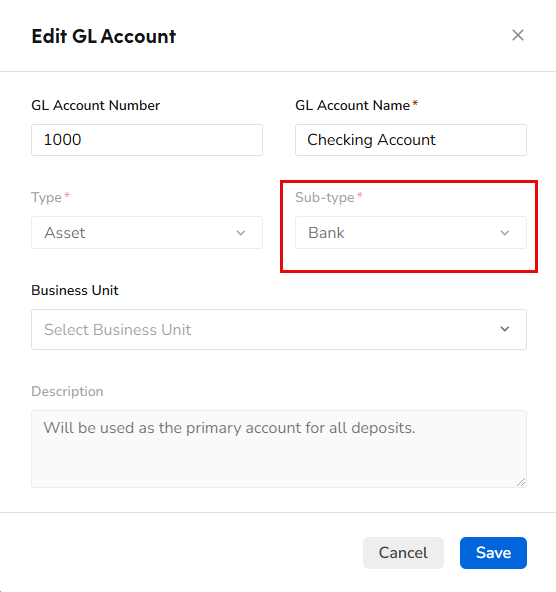
Before creating bank deposits, you must have a bank account set up. In ServiceTitan, a bank account is a general ledger account with a subtype of Bank.
To create a bank account:
Go to the navigation bar and click Settings
 .
In the side panel, click Accounting > General Ledger Accounts.
On the General Ledger Accounts settings screen, click Add GL Account.
Enter the account details.
Select Asset in the Type dropdown.
Select Bank in the Sub-type dropdown.
When finished, click Add.
Create Deposits
In ServiceTitan, Bank Deposits are groupings of payments that are named/dated to align better with your bank statements. This makes it easier to track and reconcile payments that directly affect your bank account(s).
Go to the navigation bar and click Accounting.
In the side panel, click Bank Deposits.
Click Create Deposit. The Create Deposit pop-up opens.
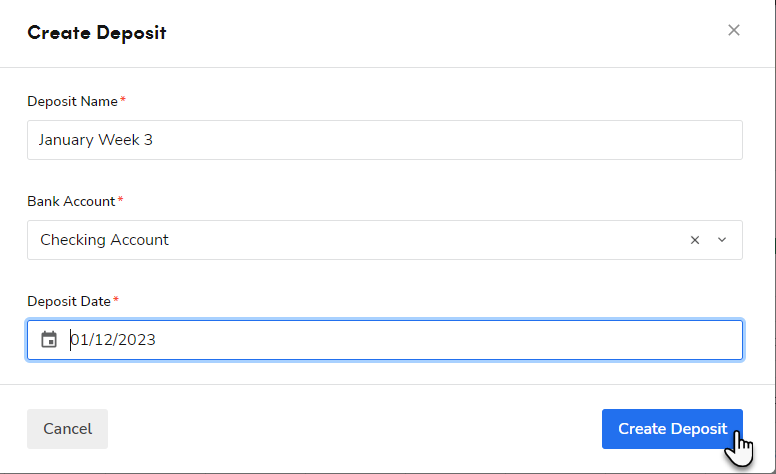
Enter a Deposit Name.
Select a Bank Account from the dropdown.
Set the Deposit Date.
Set the Post Date. The Post Date controls which accounting period the deposit posts to. It fills in from the Deposit Date when you first open the pop-up, and you can change it to a different date. If you change the Deposit Date after setting the Post Date yourself, the Post Date you entered is kept.
Click Create Deposit when you’re finished.
Note: Every field in the Create Deposit pop-up is required, including the Post Date.
Note: If your account uses Accounting Periods, the Post Date must fall in an open period. When no open period is available, you cannot save the deposit. Reopen the period or select a date in an open period.
Batch and export deposits
Go to the navigation bar and click Accounting.
In the side panel, click Bank Deposits.
Click a deposit. The deposit’s summary page opens.

Click the blue Actions dropdown and select Create Batch. Every payment in the deposit is placed into a new batch.
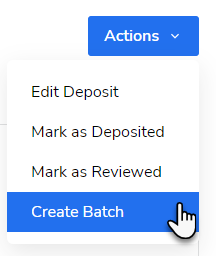
Export the batch from Batch/Export Transactions.
Tip: You can also post, unpost, and sync the deposit’s batch from the Actions dropdown after the batch has been created.
Take Deposit actions
Go to the navigation bar and click Accounting.
In the side panel, click Bank Deposits.
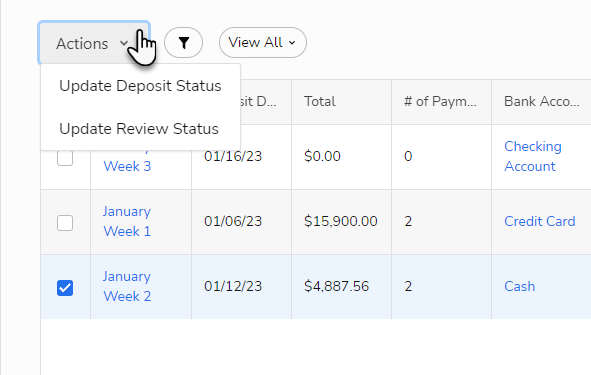
Place a checkmark in the boxes next to the deposits you want.
Click the Actions dropdown on the left.
Select an action from the dropdown.
Update Deposit Status: Change the deposit’s status between Open and Deposited.
Update Review Status: Change the deposit’s review status between Needs Review and Reviewed.
Take Payment actions
Each tab on the Customer Payments module allows you to take actions on the listed payments, both individually and in bulk.
To perform individual actions on a payment:
Go to the navigation bar and click Accounting.
In the side panel, click Customer Payments.
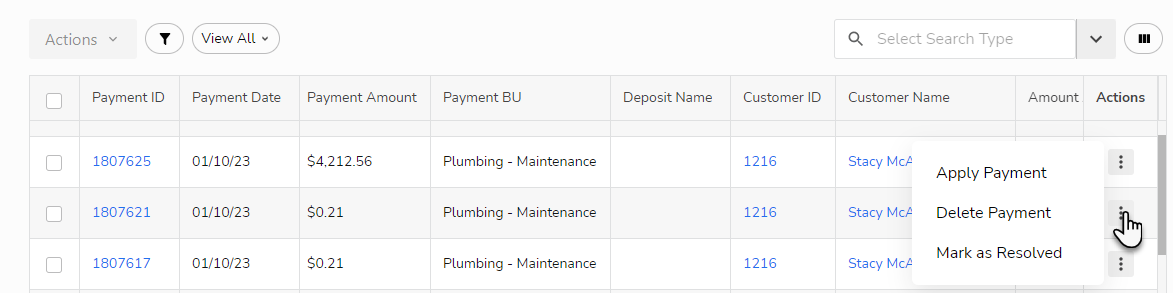
Find a payment and click Actions
 .
Select an action from the dropdown.
To perform bulk actions on multiple payments:
Go to the navigation bar and click Accounting.
In the side panel, click Customer Payments.
Place a checkmark in the boxes next to the payments you want.
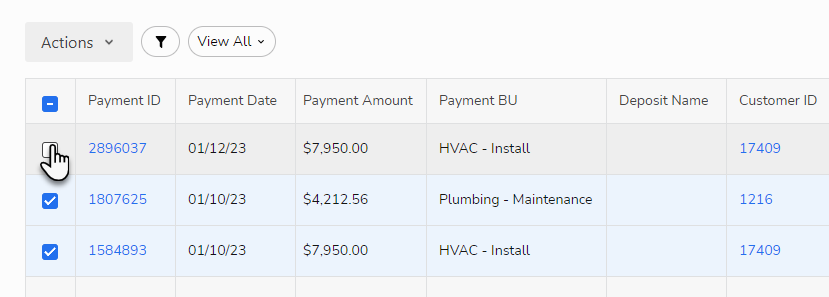
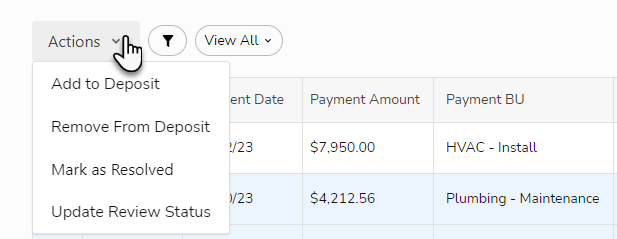
Click the Actions dropdown and select an action.
Individual payment actions
You can perform the following actions:
Apply payment
Delete payment
Mark as Resolved
Apply Payment
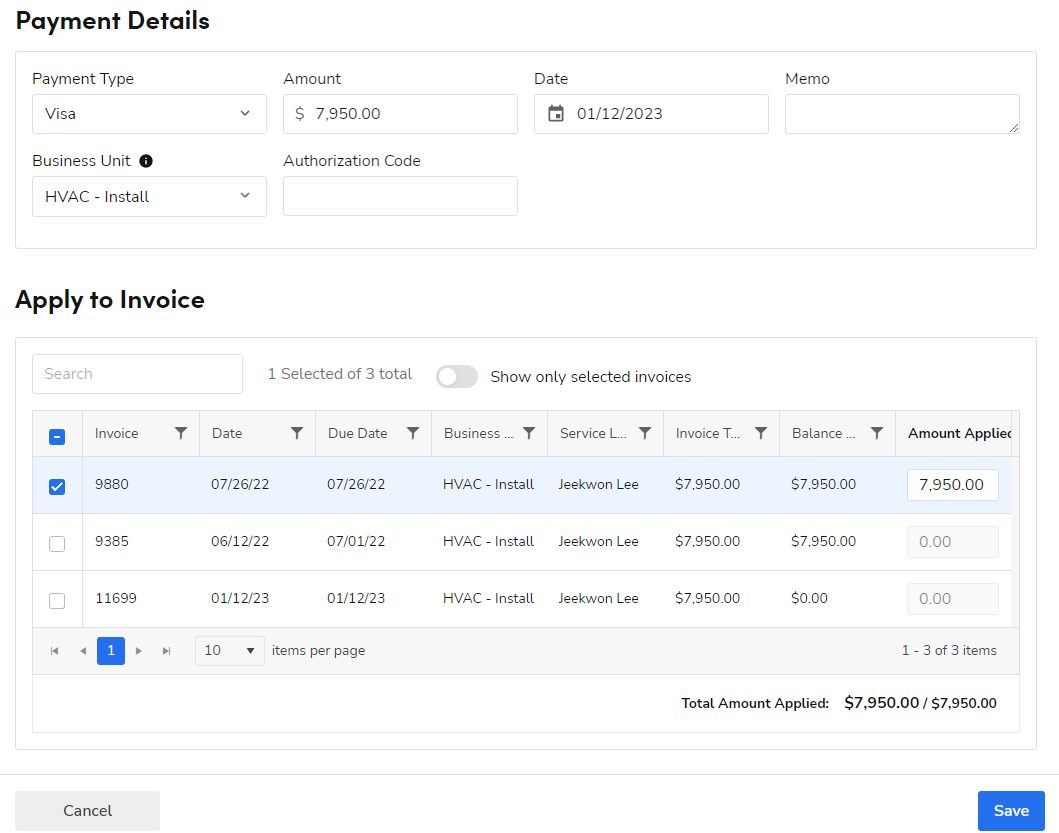
Opens an Edit Payment page. Here you can review, edit, and apply the payment. For more information, see Apply available credit to an invoice.
Delete Payment
Permanently remove the payment record and unapply the payment from any invoice(s) that it is applied to. You must confirm this action as it is final.
Mark as Resolved
Change a failed payment’s Resolved Status to Resolved.
Bulk payment actions
You can perform the following bulk payment actions:
Add to Deposit
Remove from Deposit
Mark as Resolved
Update Review Status
Add to Deposit
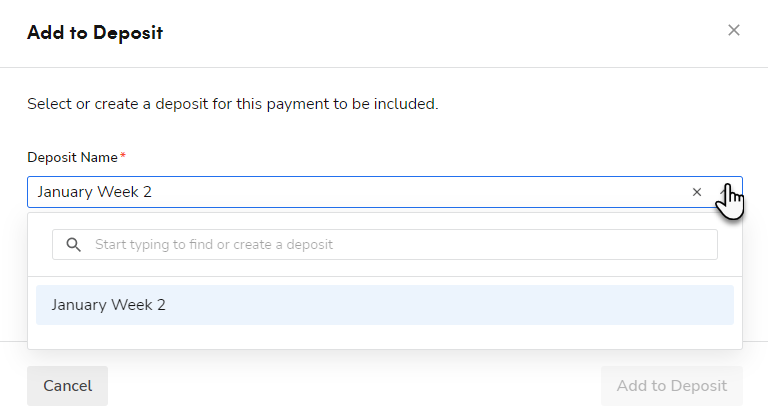
Add the payments to a bank deposit. A pop-up appears for you to select a deposit from the Deposit Name dropdown.
Remove from Deposit
Remove the payments from their deposits and place them back into Ungrouped Payments. You must confirm this change.
Mark as Resolved
Change a failed payment’s Resolved Status to Resolved.
Update Review Status
Opens a pop-up where you choose a new status for every payment from the Review Status dropdown.
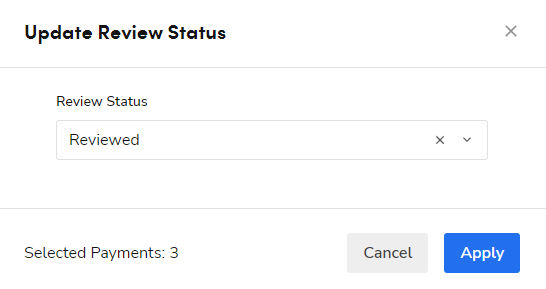
Note: Every payment is changed to the same new status.
Edit Customer Payments columns
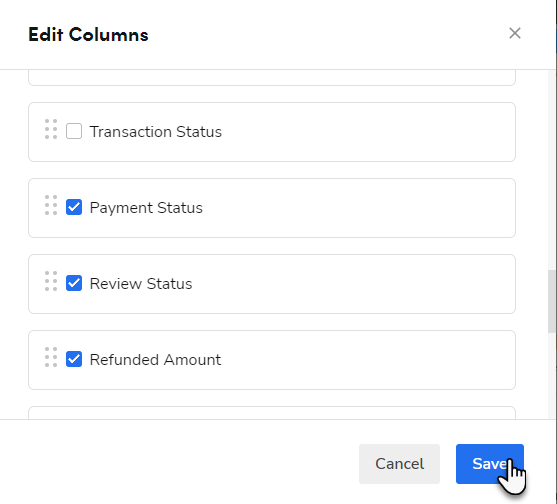
You can add, hide, and rearrange the columns of the payment list for each tab. To edit columns:
Go to the navigation bar and click Accounting.
In the side panel, click Customer Payments.
Click a tab (Payment Status, Applied Status, Refund Status, Ungrouped Payments).
Click the Edit Columns button. The Edit Columns opens.
Click the check box for any column you want to add or hide.
Click and hold any column name you want to rearrange and move it up or down.
Note: Moving a column up puts it further left on the payment list. Moving it down puts it further right.
Click Save and repeat steps 3-7 for each tab of the Customer Payments module.
See which account a payment is in
Coming in 83 Athens: The Current Account column and filter are available starting with the 83 Athens release.
Each Customer Payments tab has a Current Account column and filter. Current Account shows the account a payment sits in now:
Not in a bank deposit: the payment type’s GL account, usually Undeposited Funds.
In a bank deposit (Open or Deposited): the deposit’s bank account.
The value updates when you add a payment to a deposit, remove it from one, or change the deposit’s bank account. Sorting, filtering, and export all use the Current Account value, and it matches the Current Account column in the All Payments report.
The Current Account column is hidden by default. To show it, add it to the tab’s columns. For more information, see Edit Customer Payments columns. If you already added the GL Account column on Ungrouped Payments, it now appears as Current Account, so you don’t need to add it again.
Tip: To see which payments are still waiting to be deposited, filter by Current Account and select your Undeposited Funds account.
Use saved views
Coming in 83 Athens: Saved views are available starting with the 83 Athens release.
Save your filters and search as a saved view so you can switch between the lists you review most often without setting them up each time. Saved views are available on every Customer Payments tab and on the Bank Deposits module.
Note: Saved views are saved for your user in the web browser you created them in. They don’t carry over to another browser or device, and clearing your browser data removes them. On the Customer Payments module, each tab has its own saved views.
Save a view
Go to the navigation bar and click Accounting.
In the side panel, click Customer Payments or Bank Deposits.
On Customer Payments, click the tab you want (Payment Status, Applied Status, Refund Status, or Ungrouped Payments).
Set the filters and search you want to save.
Click the Saved Views dropdown and select Save Current View.
Enter a View Name and click Save.
Apply a saved view
Click the Saved Views dropdown and select a view. The list updates, and the dropdown shows the view's name.
Note: If you change a filter after you apply a saved view, the view is no longer selected. Setting the same filter values yourself doesn’t select it again.
Edit, reorder, or delete saved views
Click the Saved Views dropdown and select Edit Saved Views. The Edit Saved Views panel opens.
Make your changes:
To change the order, drag a view up or down.
To change a view, update its filters under All Filters, then click Update View.
To remove a view, click Delete View.
Note: Delete View removes the view right away. There’s no confirmation step.
Export a payment or deposit list
Coming in 83 Athens: List export is available starting with the 83 Athens release.
Download the list you’re viewing to share it or work with it in a spreadsheet. Export is available on every Customer Payments tab and on the Bank Deposits module.
Go to the navigation bar and click Accounting.
In the side panel, click Customer Payments or Bank Deposits.
On Customer Payments, click a tab.
Filter, search, or sort the list, or apply a saved view.
Click Export (the download icon) and select CSV or XLS.
The file includes every row that matches your filters and search, not only the rows on the current page, up to 100,000 rows. On Customer Payments, it includes the columns visible on the current tab, in the same order. On Bank Deposits, it includes a standard set of columns.
Note: An export of more than 100,000 rows doesn’t run. Narrow your filters and try again.
Note: To send deposits to your accounting software, see Batch and export deposits. That export is separate from this list export.
Search Payments/Deposits
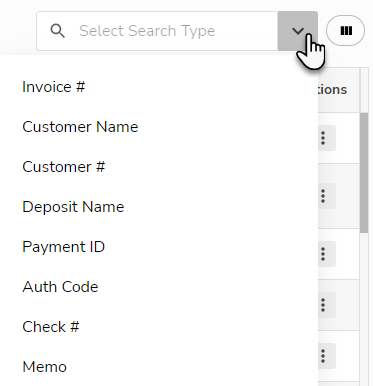
The Customer Payments and Bank Deposits modules allow you to search for and open specific payments/deposits. You can search by:
Invoice #
Customer Name
Customer #
Deposit Name
Payment ID
Auth Code
Check #
Memo
To search for a payment/deposit:
Go to the navigation bar and click Accounting.
In the side panel, click Customer Payments or Bank Deposits.
Click a tab (Payment Status, Applied Status, Refund Status), if applicable.
Click the Select Search Type dropdown and select a search type.
Note: The Bank Deposits module only allows you to search by Deposit Name.
Input your search and press Enter on your keyboard. The payment(s)/deposit(s) appear in the list.

Want to learn more?
Visit ServiceTitan Academy and enroll in Accounting Basics
See Accounting