Overview
Use Findings to capture, track, and resolve issues identified at a customer location. A finding can be associated with a specific piece of equipment or with the location as a whole. Equipment Findings appear on the Findings tab in the Equipment drawer and in the Findings section of the Location screen. Location findings, which aren’t tied to specific equipment, appear in the Findings section of the Location screen.
The Location screen provides a complete view of all findings for the location and can be accessed from Findings in the left navigation or by scrolling below the Equipment section. Both equipment and location Findings support the same details, photos, actions, and reporting, helping streamline follow-up work, create estimates, and resolve identified issues more efficiently.
Who uses this feature
Office users
Things to know
You can add the Findings component to a work order document template, allowing the Work Order Summary to automatically include all Findings logged during the job. For more on how to create a document template, see Create a new document template with Template Manager.
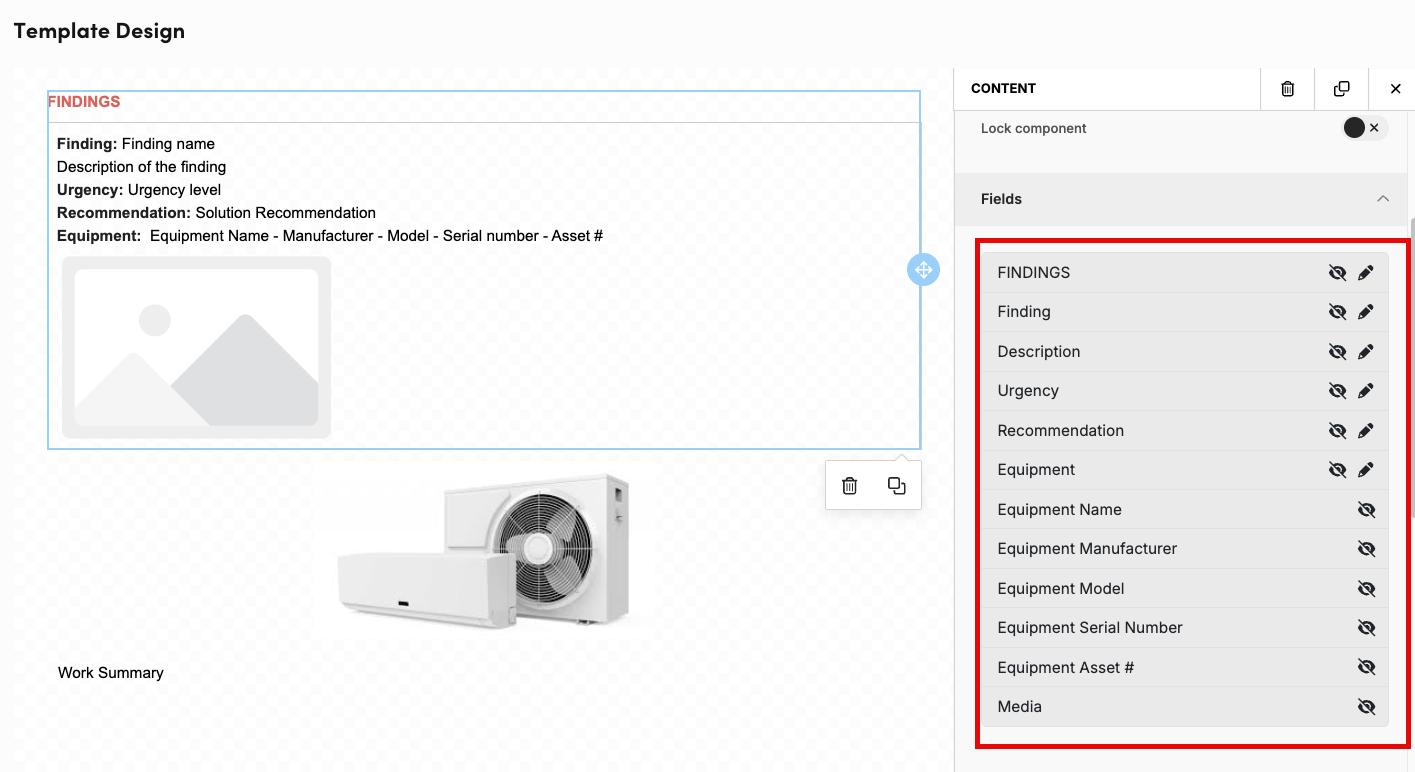
Only Findings that are active when the report is sent are included in the summary.
Findings that were created and then archived before the report is sent do not appear in the summary.
All field label names are fully customizable. You can select to show or hide any field as needed, giving you complete control over how findings are presented in your documents.
Every finding has an audit trail that shows who changed it, when, and what the values were before and after the change. For more, see View a finding's audit trail.
Findings on the Location screen
The Findings section on the Location screen lists all findings associated with the location, including equipment findings and location findings that aren’t tied to a specific piece of equipment.
To access Findings:
On the Location screen, click Findings.
From the Findings section, you can:
Expand or collapse the section using the arrow in the section header.

Sort and reorder columns, show or hide columns. Your column layout is saved for your next visit.
Click Edit Columns.

Drag to reorder the column.
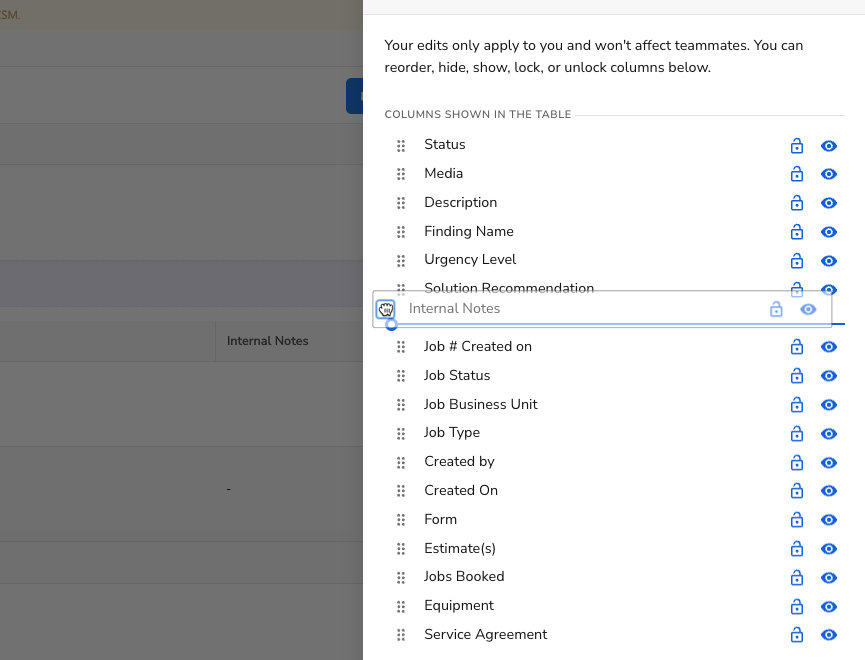
Click Lock to prevent a column from being hidden or reordered. To allow changes to a locked column, click Unlock.
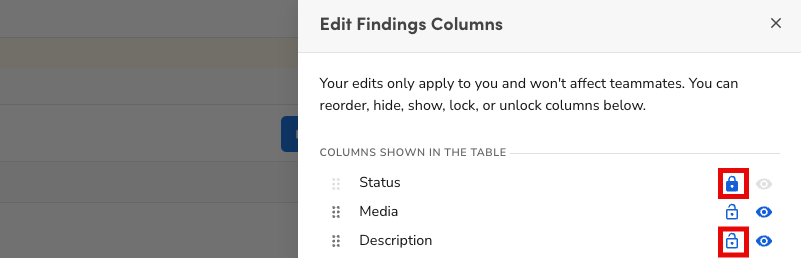
Click Hide to remove a column from the table. To display it again, click Unhide.

Once done, click Apply.
Drag and drop Job # Created on to the Grouped by section to group findings by source job number.
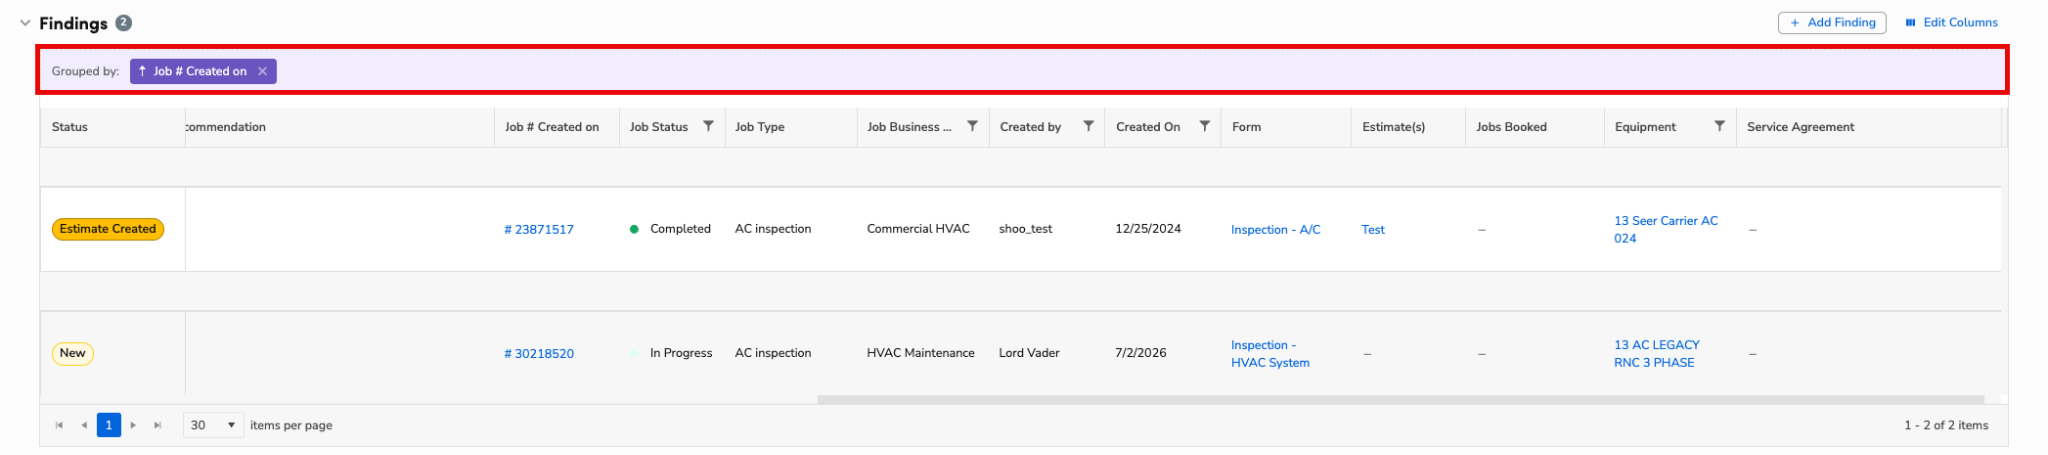
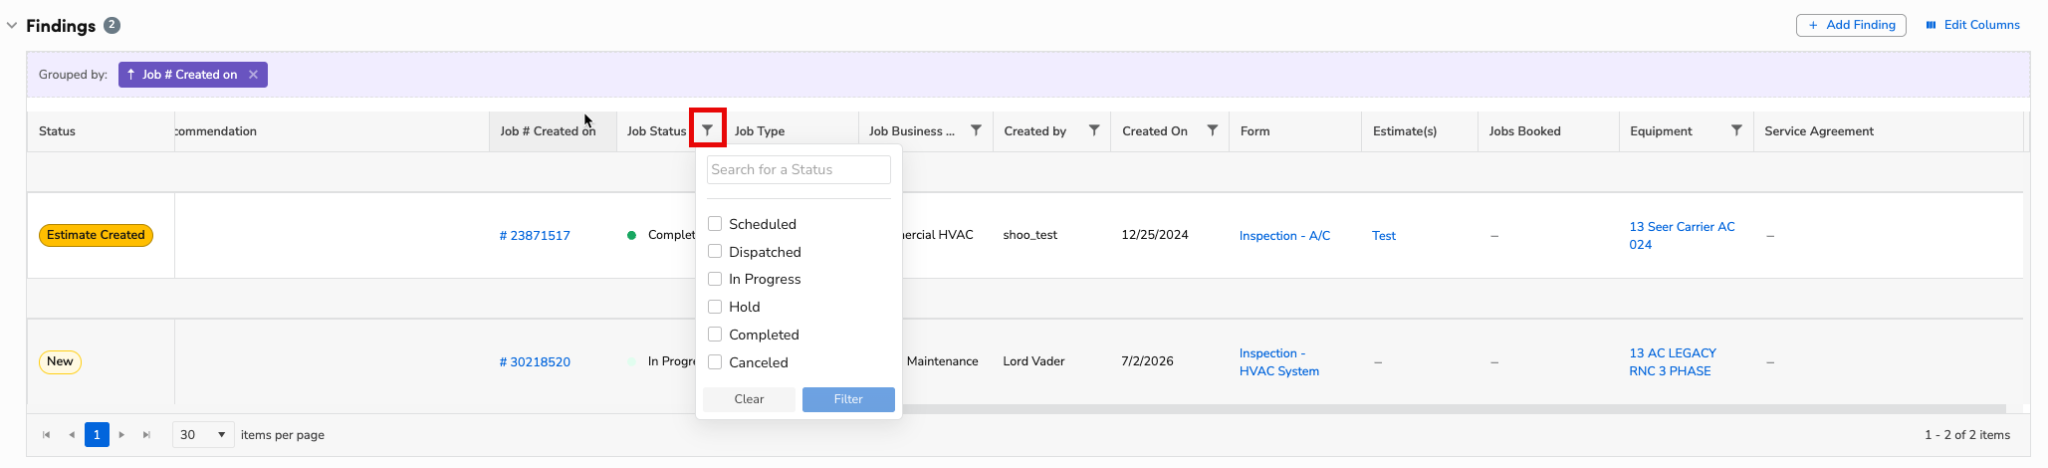
Filter findings by Created by, Created on, Job Status, Job Business Unit, and Equipment. Click Filter next to each column.
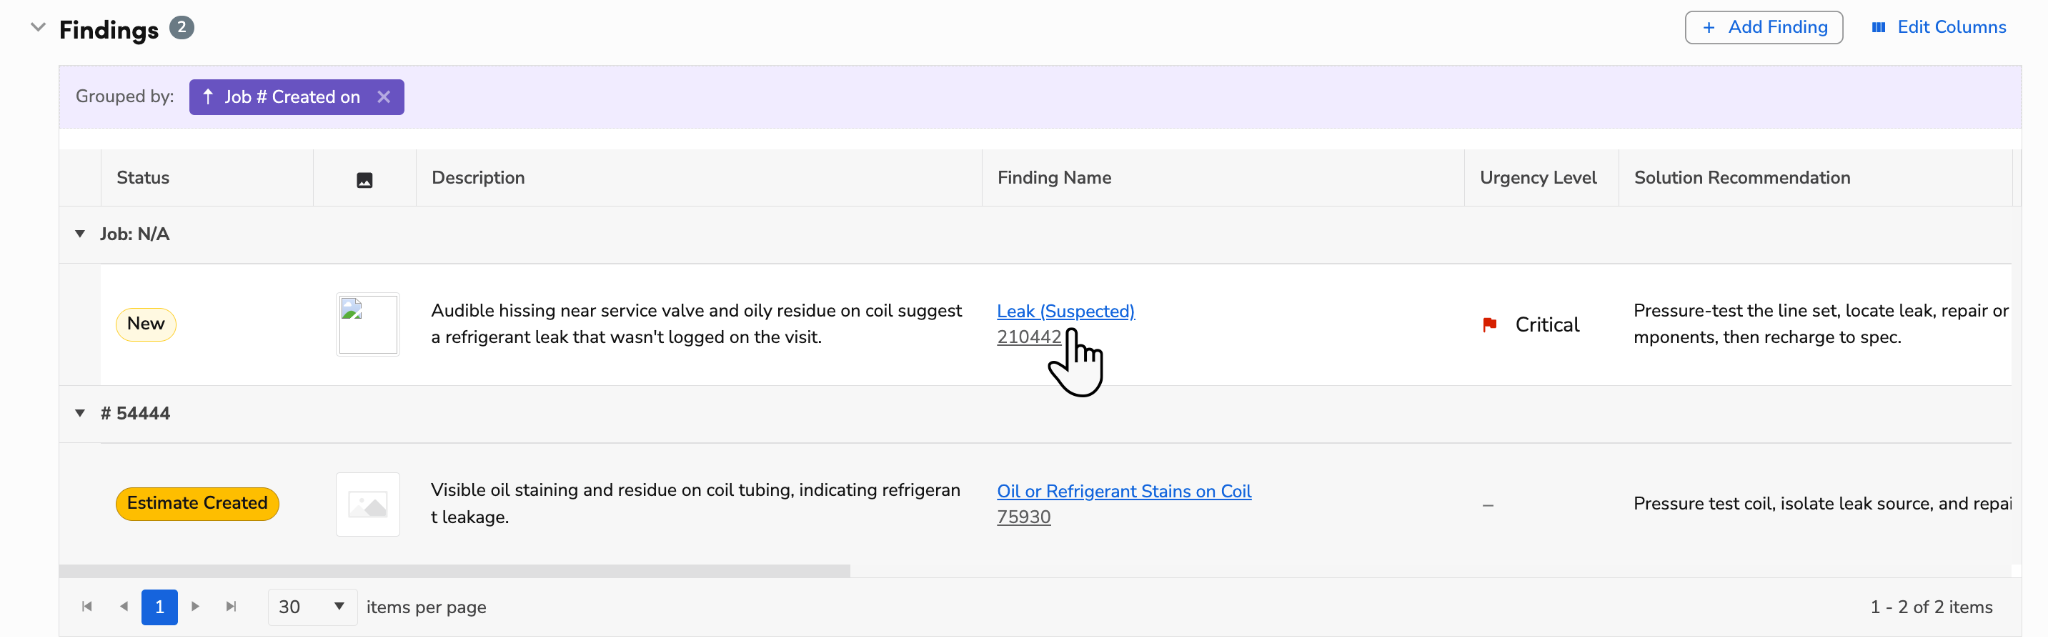
Click a Finding ID or Name to open the finding in a drawer, where you can review its details and take action without leaving the page.
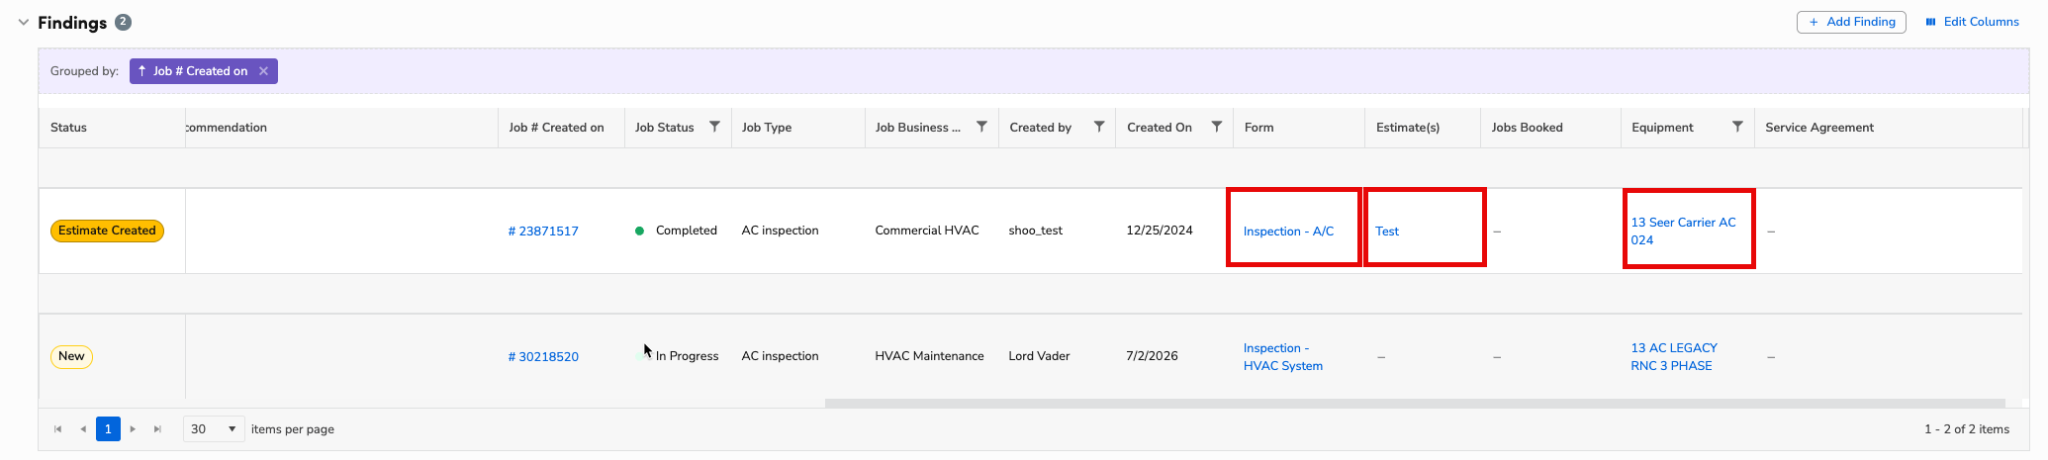
Open any linked estimate, job, equipment record, or form in a new tab.

Create a location finding
You can create a finding directly from the Location screen, including a finding that isn't tied to any equipment.
On the Location screen, go to the Findings section.
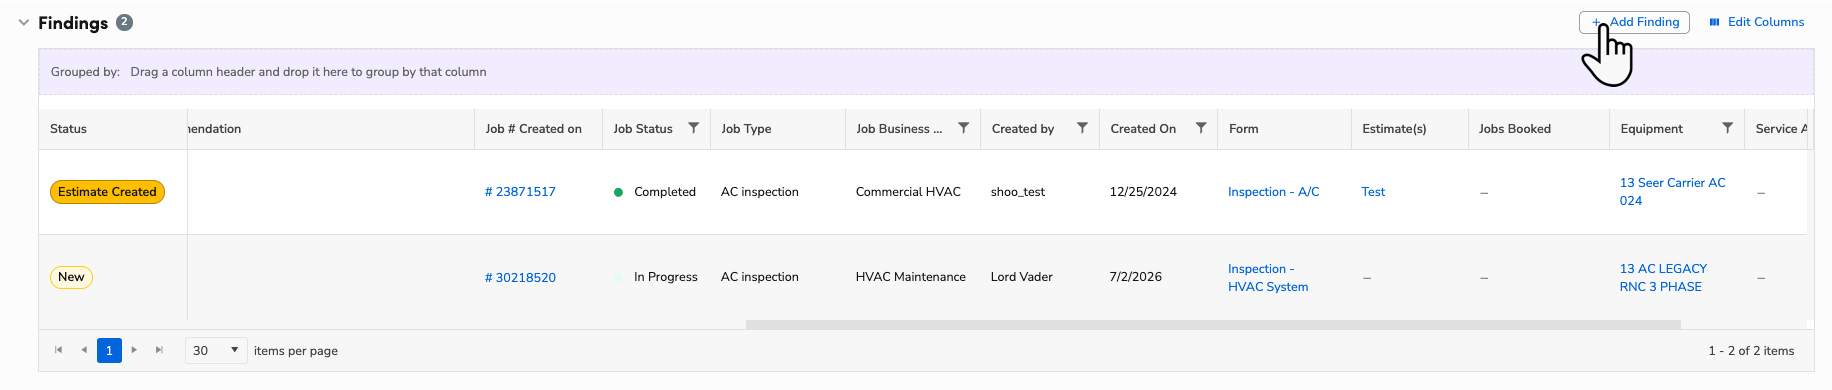
Click Add Finding.
In the drawer that opens, fill out the finding details:
Finding Name: Enter a name for the finding.
Urgency Level: Select an urgency level.
Description: Enter a description of the finding.
Equipment (optional): Select a piece of equipment installed at the location if the finding is associated with it.
Source Job (optional): Select a job booked for the location if the finding is linked to a job.
Solution/Recommendation (optional): Enter a proposed solution or recommendation.
Internal Notes (optional): Add notes for internal use.
Attachments (optional): Click Upload Files to add attachments.

When finished, click Save.
The new finding appears in the Findings section on the location and on the Findings dashboard. For more, see Use the Findings dashboard.
Equipment Findings
Use Equipment Findings to quickly capture equipment issues with photos and details. This helps you streamline follow-ups, build estimates, and resolve jobs faster.
View finding details
On the Location screen, click Equipment.
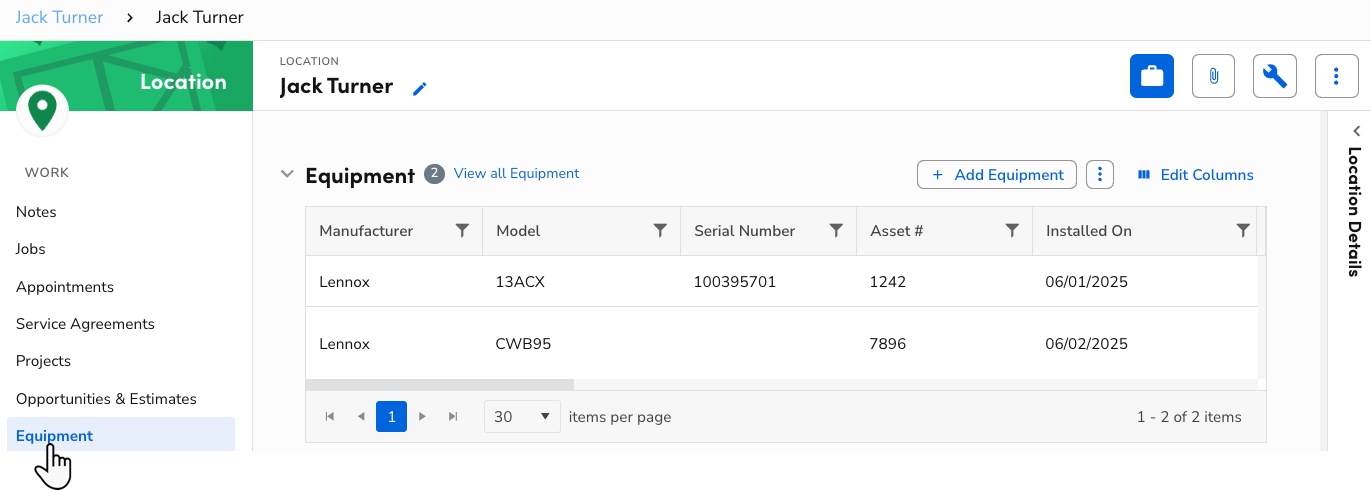
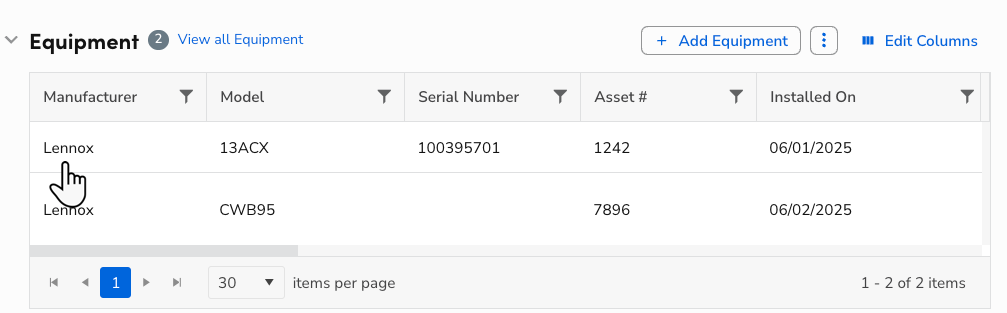
Select the finding you want to view.
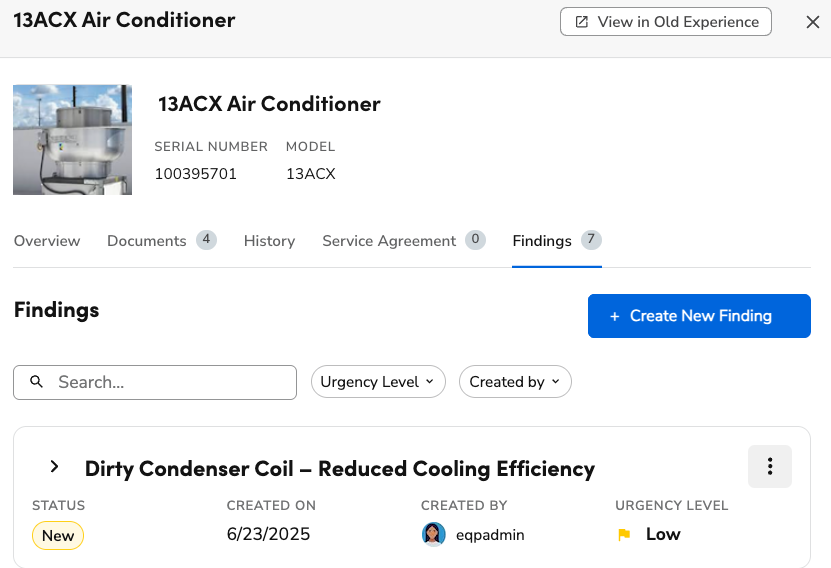
On the Equipment drawer, click Findings.
Click (arrow icon) next to the finding.
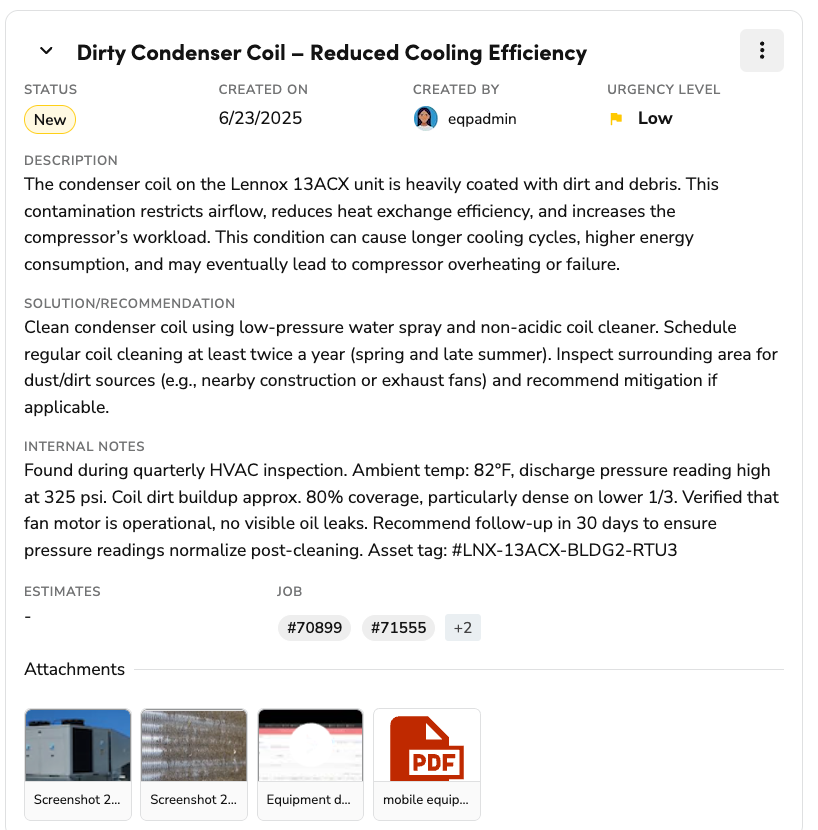
You can see description, recommendation, internal notes, attachments, linked estimates or jobs, and more.
Create a new equipment finding
Create and manage findings related to specific equipment.
On the Location screen, click Equipment.

Click View all Equipment to select a specific equipment record.
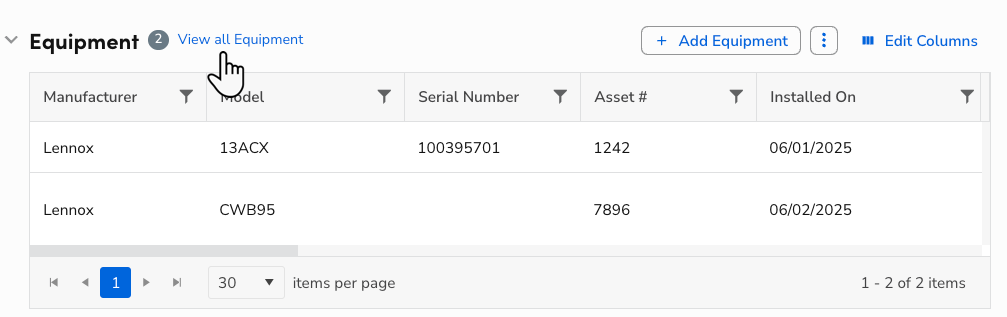
Or, click the equipment record.
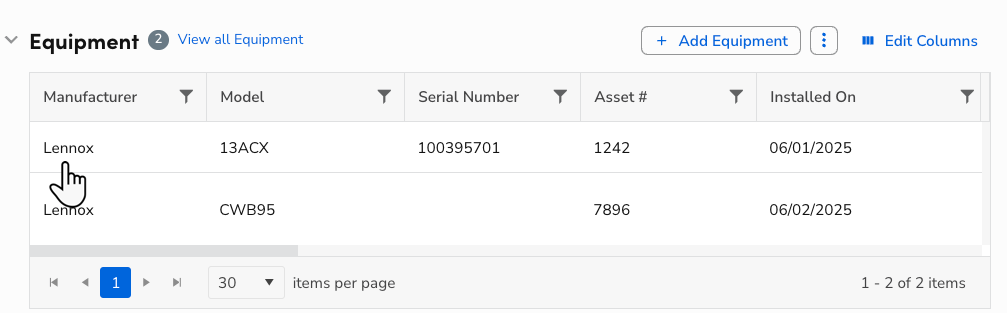
On the Equipment drawer, click Findings.
Click +Create New Finding.

On the Create Finding window that opens, fill all required fields.
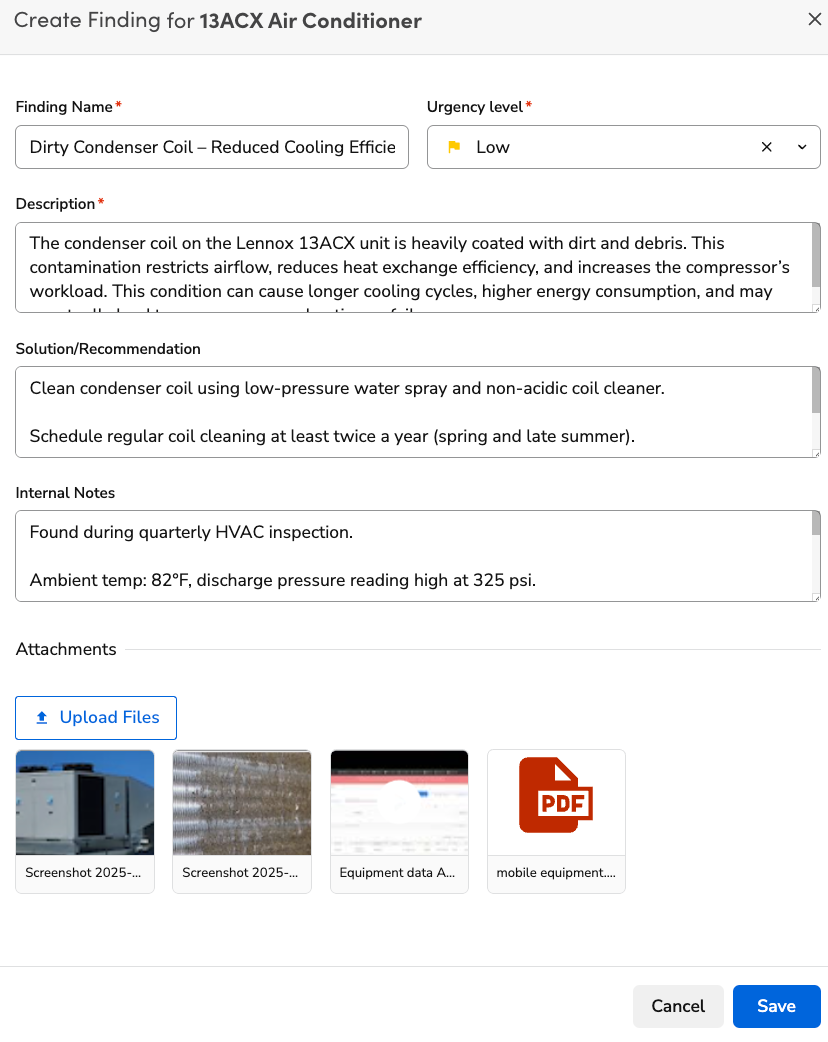
When finished, click Save.
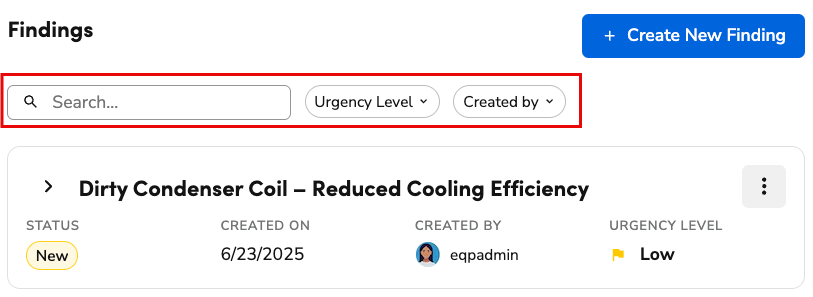
Filter and search for findings
Use filters to locate specific findings:
Urgency level
Created by
Use Search to find records by keyword.
Manage findings in the Findings Drawer
You can access and manage the Findings Drawer from either the Findings section on the Location screen or the Findings tab in the Equipment drawer.
To open the Findings Drawer:
From the Location screen: On the Location screen, click Findings, then click the finding ID or name.
From an equipment record: On the Location screen, click Equipment, select an equipment record directly or click View All Equipment to find one, and then click the Findings tab in the Equipment drawer. Select the finding you want to manage.
To see a history of changes to the finding, click on the Audit Trail icon in the drawer header. For more, see View a finding's audit trail.
In the Findings Drawer, click More , then select one of the following actions:
Edit Finding
Create Estimate
Book a Job
Add to Existing Job
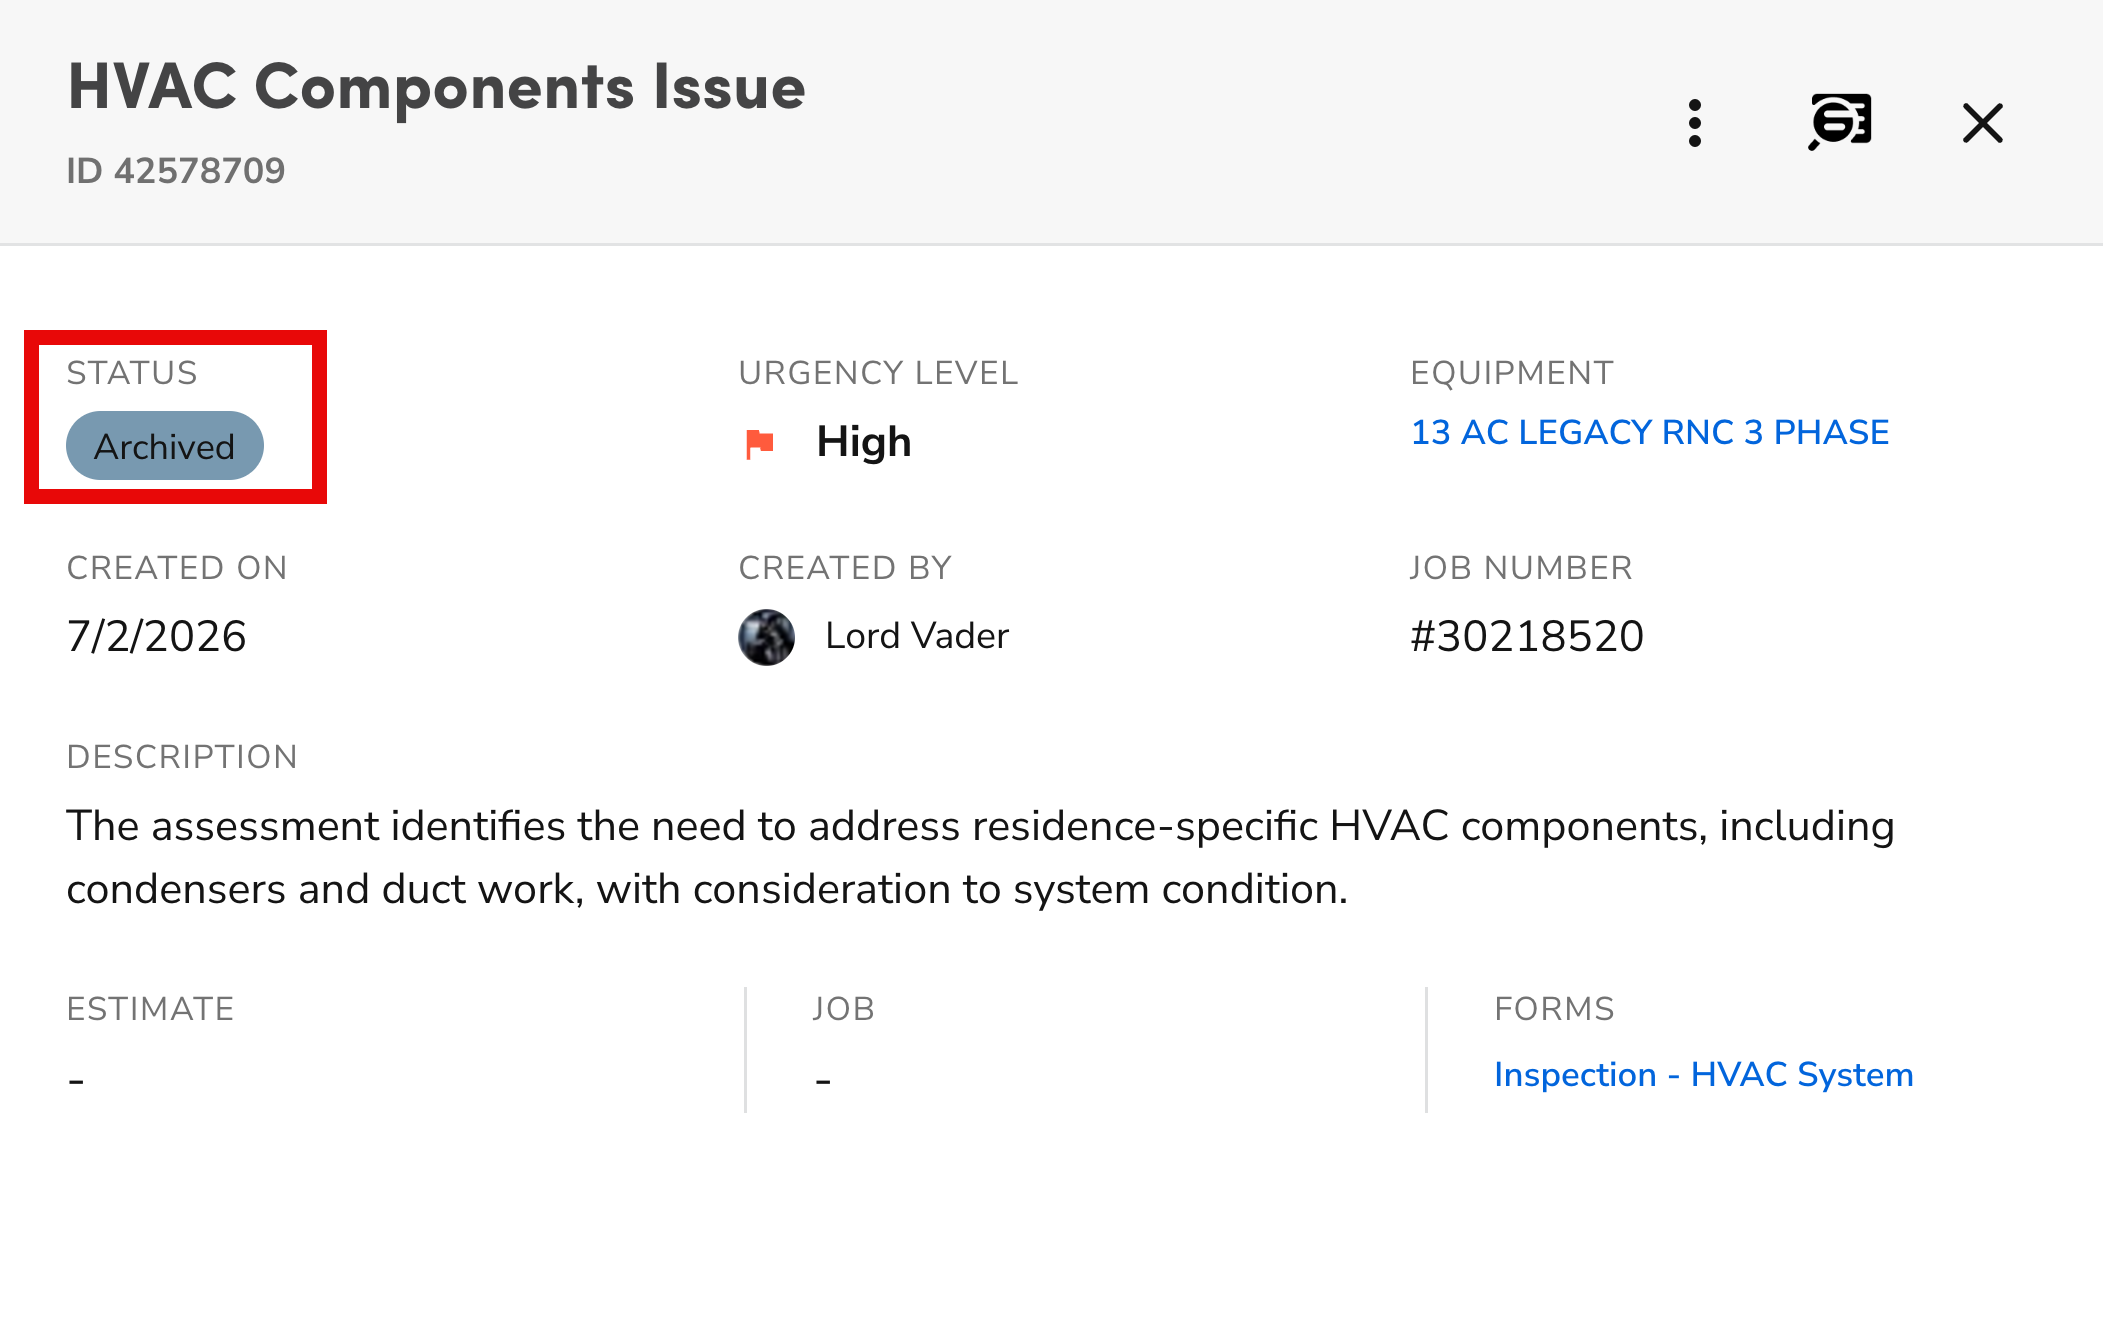
Archive Finding

In the Findings Drawer, click More, then select one of the following actions:
Select Edit Finding.
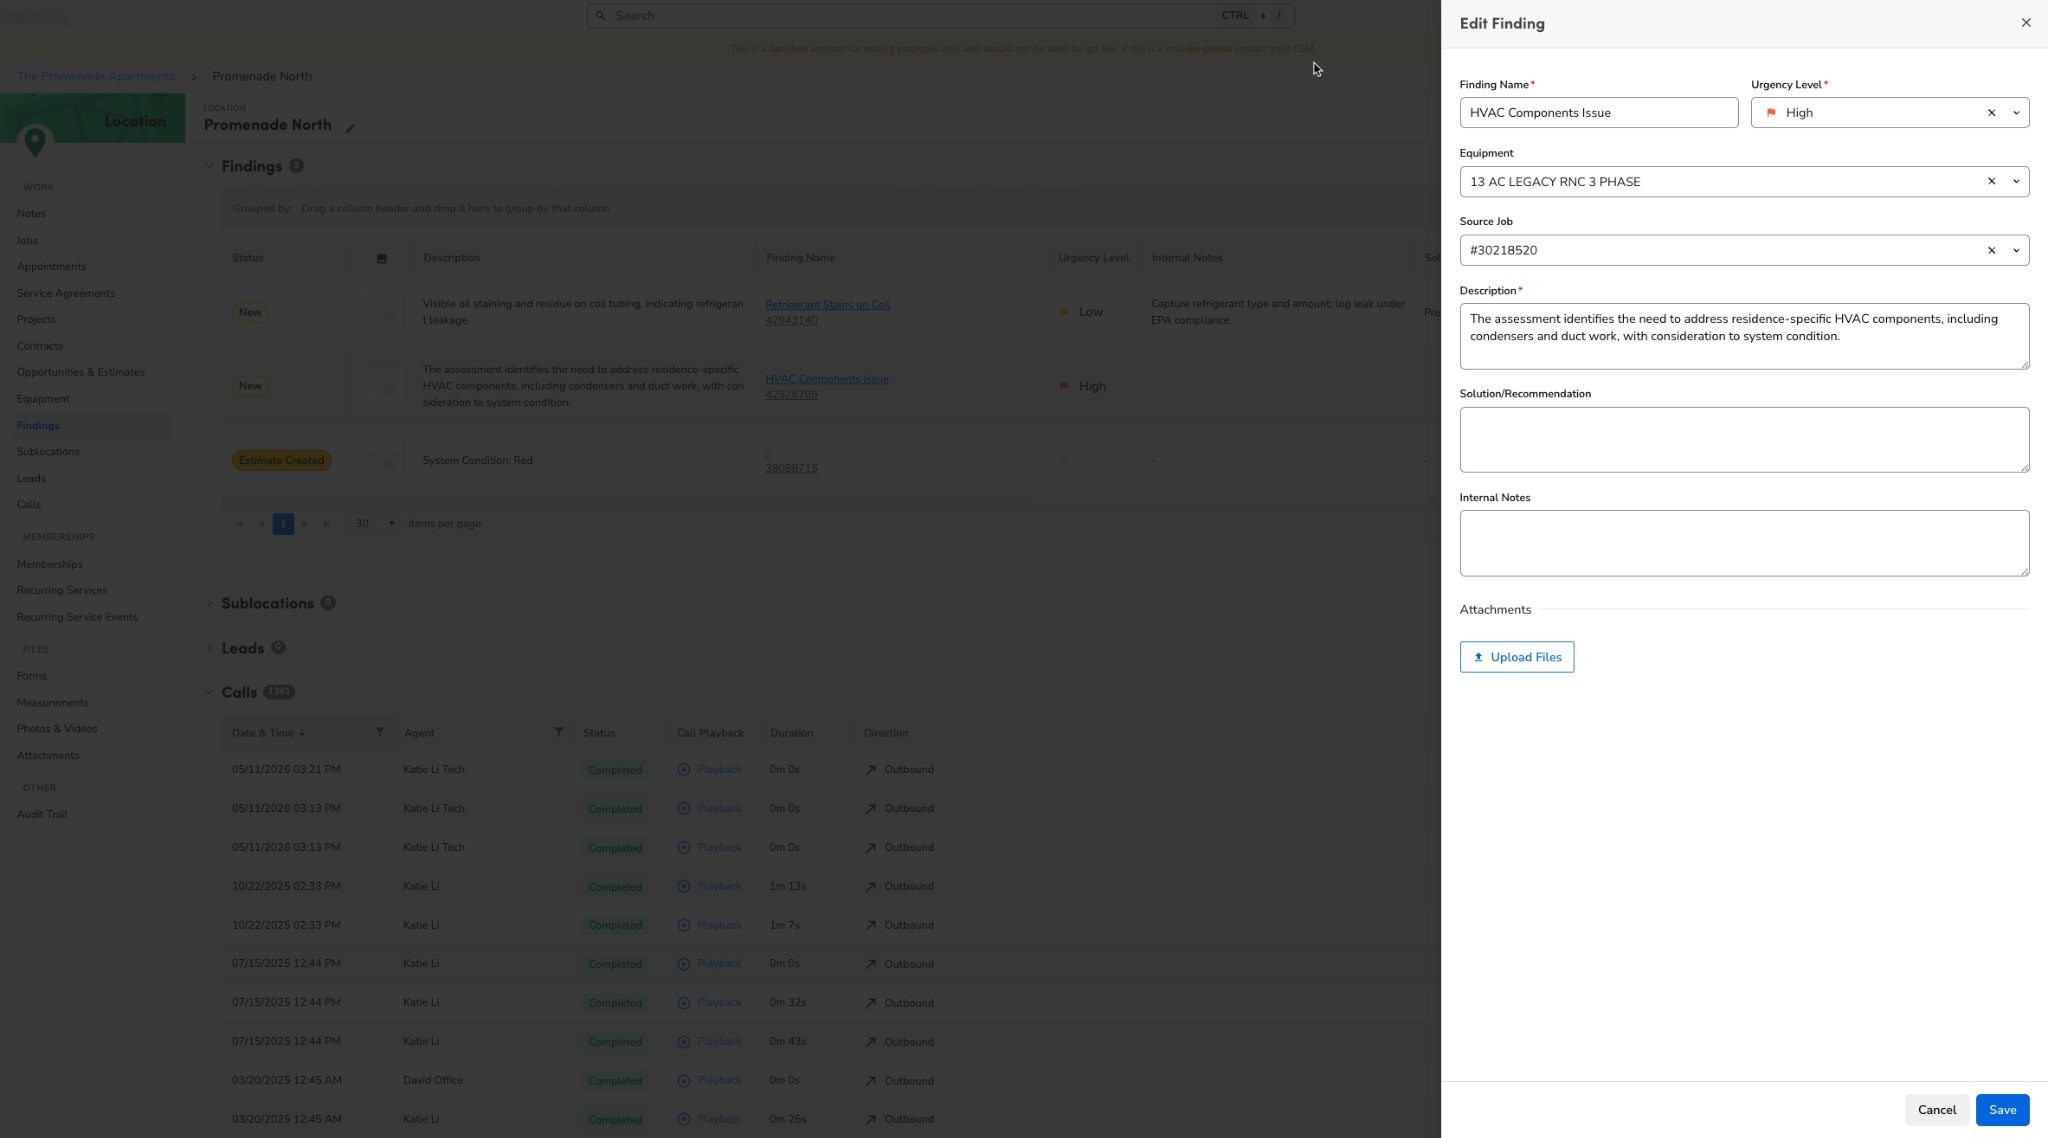
In the window that opens, update the necessary fields, then save your changes.
Note: When editing a finding, you can change or clear the linked Equipment and the Source job. Clearing Equipment converts it to a location finding, so it no longer appears on that equipment’s Findings tab.
Select Create Estimate.
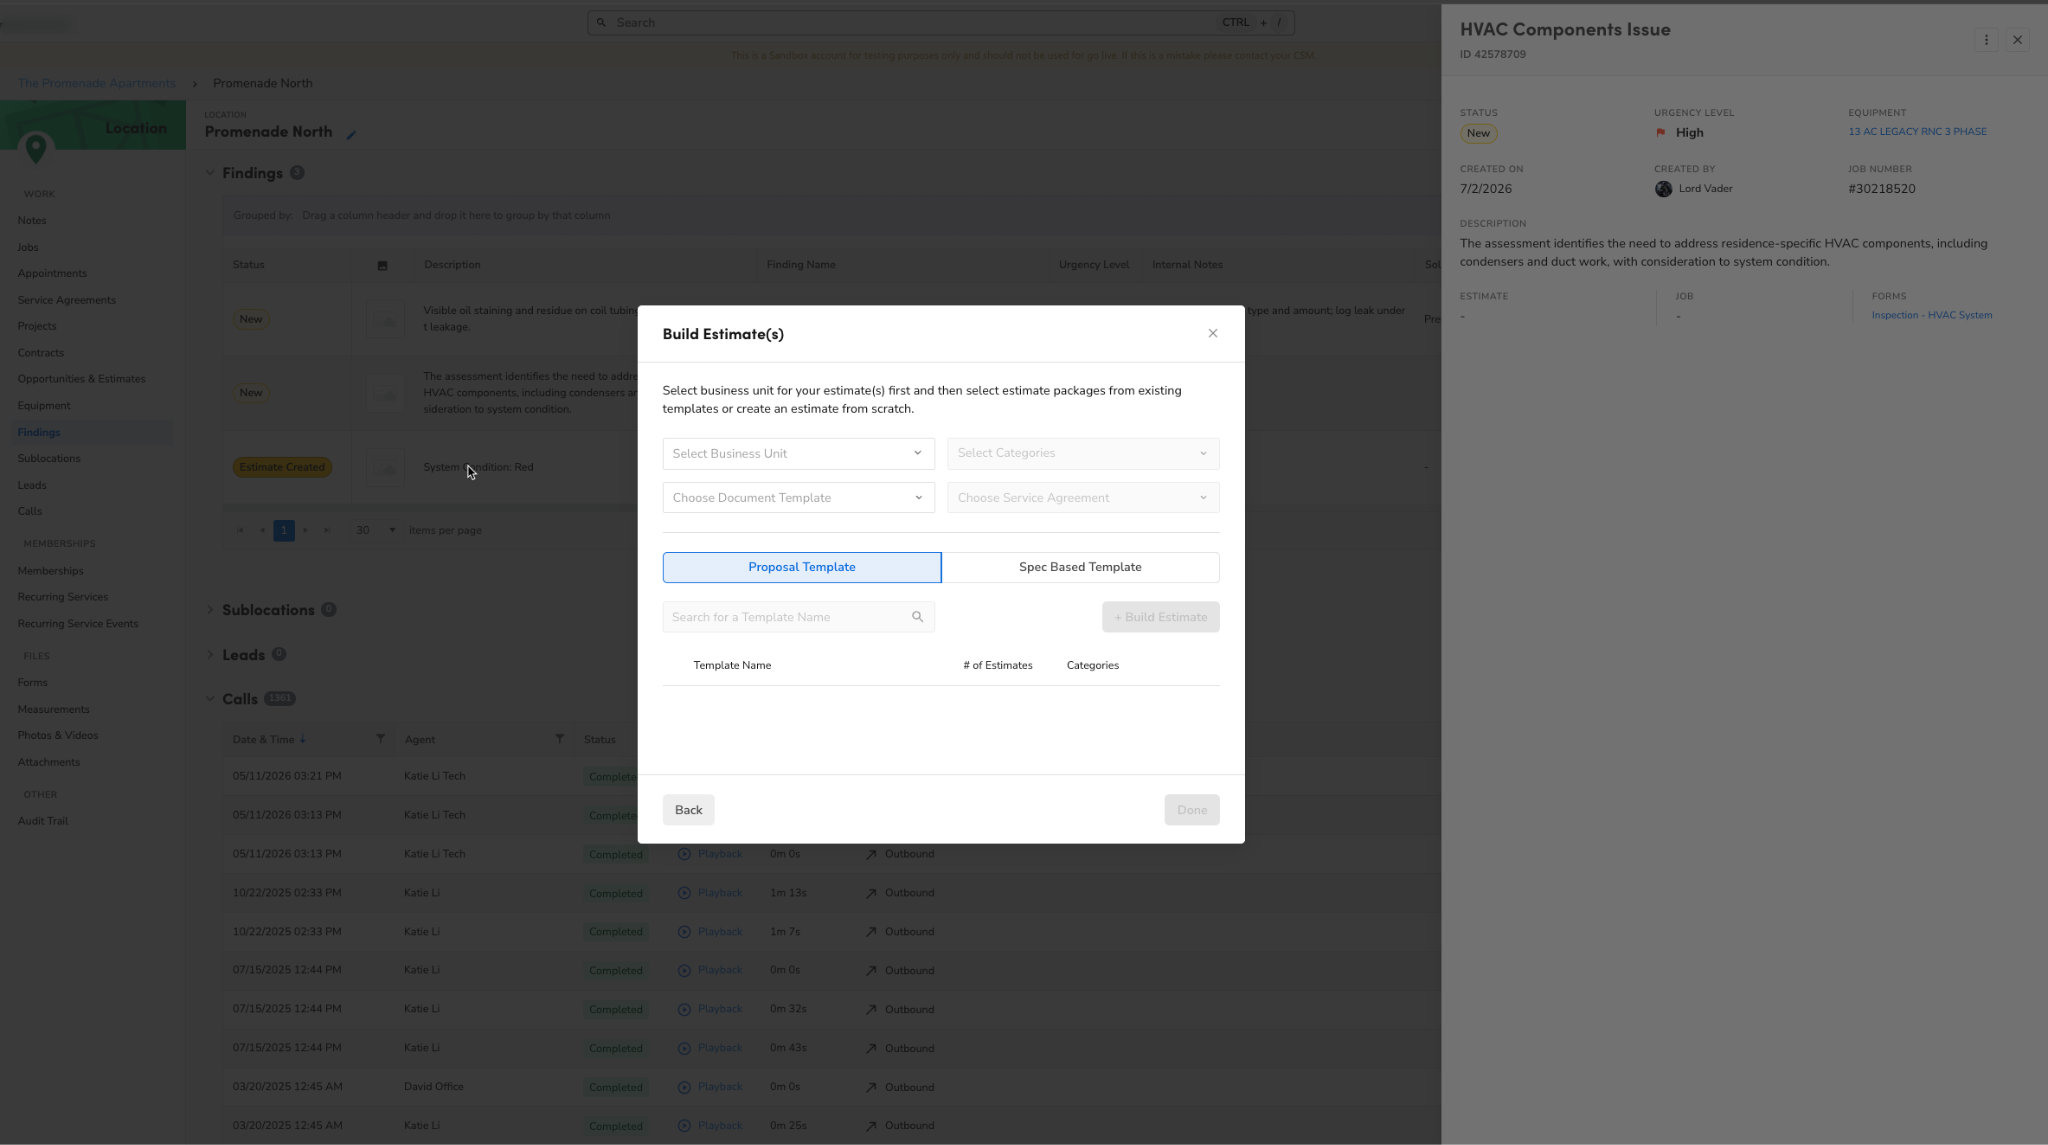
On the Build Estimate(s) screen that opens, fill out estimate details. For more, see Add and edit estimates in ServiceTitan.
If your account uses ServiceTitan CRM, creating an estimate from one or more findings also creates a CRM opportunity, with each selected finding listed on it. Booking a job from a finding without creating an estimate does not create an opportunity.
Note: If an opportunity already exists for the finding, you're asked whether to add the estimate to that opportunity or create a new one.
Select Book a Job.
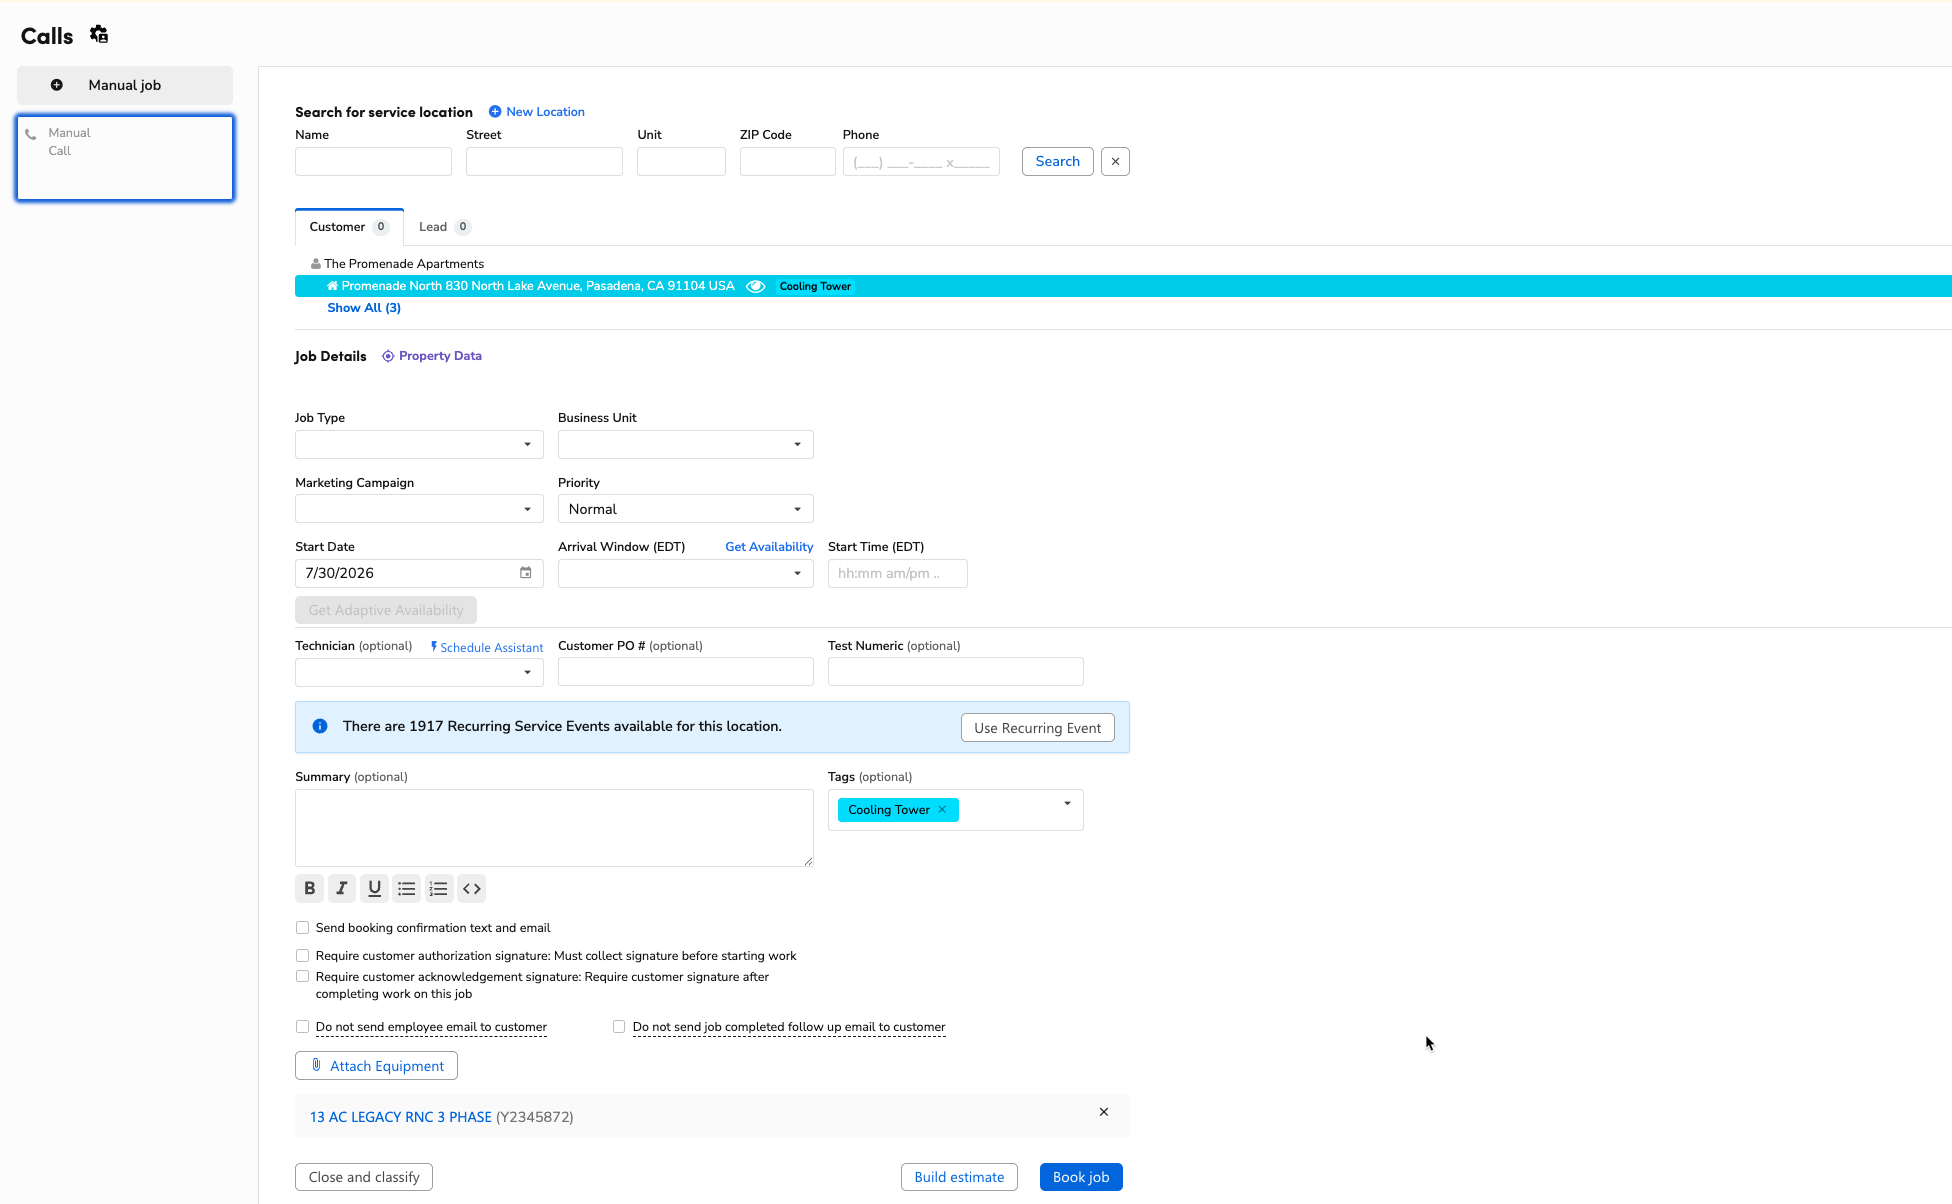
You are redirected to the Job Booking screen. For more, see Book a job.
Select Add to Existing Job.
Select the job to link the finding to.
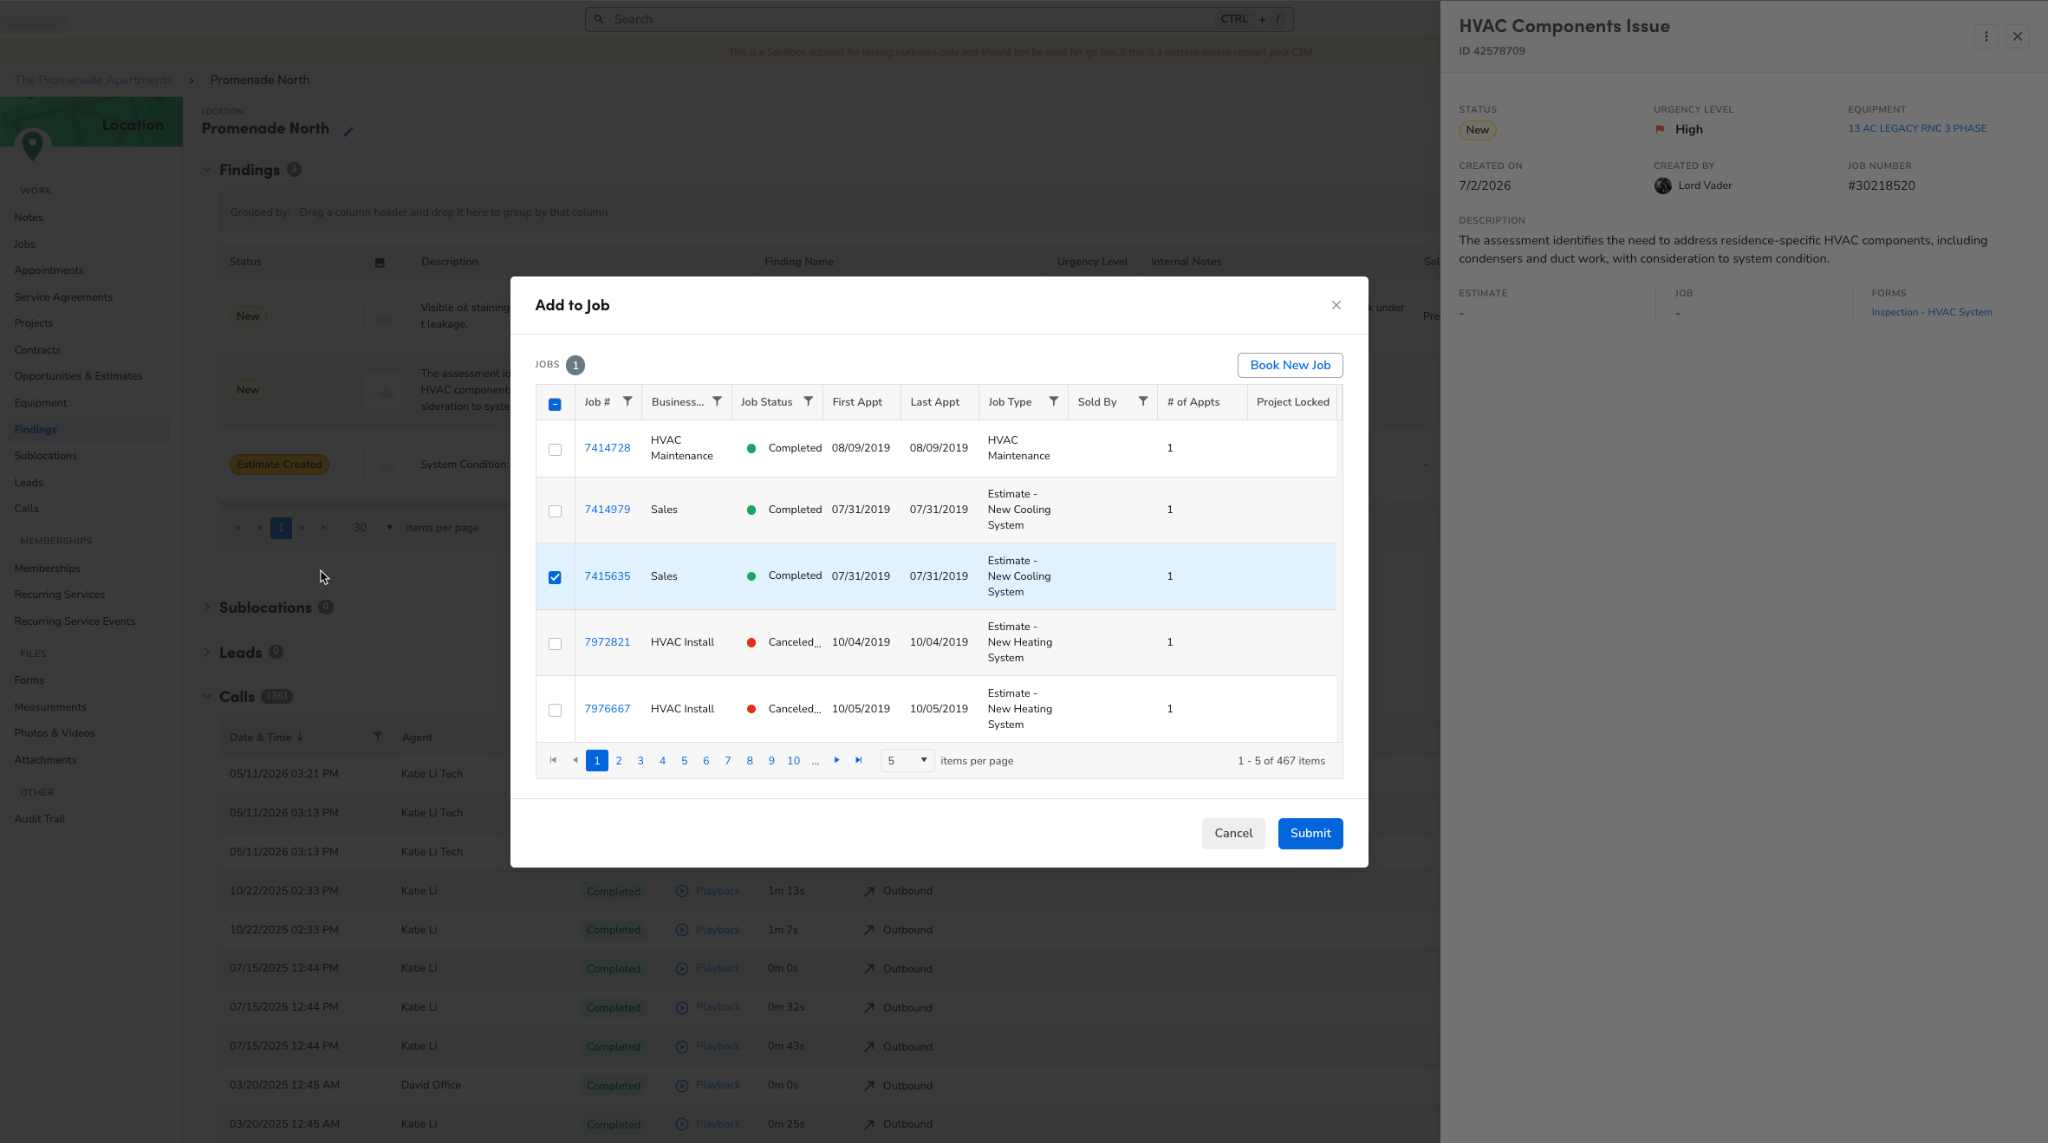
Click Submit.
Select Archive Finding.
Once done, the status will be updated and the finding will be removed from the Findings table.
View a finding’s Audit Trail
The Audit Trail is a complete record of the changes made to a finding. For each change, it shows who made it, when, and the values before and after. Use it to answer questions about a finding, review how technicians document their work, or see which changes were made automatically.
Note: View Audit Trail permission is required to see the audit trail. If you don't have it, the Audit Trail icon doesn't appear in the Findings Drawer. Please contact your account administrator.
The Findings Audit Trail is available anywhere you can open the Findings Drawer, including the Findings section on the Location screen, the Findings table on a job or estimate screen, and the Follow Ups and CRM tabs in the navigation bar.
Open the finding in the Findings Drawer.
In the drawer header, click the Audit Trail icon.
The Audit Trail opens. To return to the finding, click the back arrow. To close the audit trail, click the close icon.
.png?sv=2026-02-06&spr=https&st=2026-11-20T06%3A08%3A14Z&se=2026-11-20T06%3A25%3A14Z&sr=b&sp=r&sig=%2B%2B%2B1prVaW7YOSz9JdI1idpTTmuWhHPRH1aS8jLXq2Gg%3D)
Read the change log
Each row in the table is one change. The newest changes appear first. To change the order, click the Date & Time column header.
Date & Time: When the change was made.
Username: Who made the change. Changes made automatically show System, and changes made by Atlas show Atlas.
Action: The type of change, such as Added, Modified, or Deleted.
Field: The field or linked record that changed.
Before and After: The values before and after the change. A dash (-) means the field was empty before the change, or was cleared by it.
If no changes have been recorded, the table shows No changes have been recorded for this finding.
.png?sv=2026-02-06&spr=https&st=2026-11-20T06%3A08%3A14Z&se=2026-11-20T06%3A25%3A14Z&sr=b&sp=r&sig=WFhP0%2FgdCp%2FvhQuSotWKu3ZmGC0mEt8PEvrsOViqvtQ%3D)
Filter the audit trail
Use the filters above the table to find a specific change. Filters work together, so a row must match all of them to appear.
Date: Select a start and end date.
Username: Select the person who made the change, or System or Atlas.
Action: Select one or more actions.
Field: Select one or more fields. Only fields that have changed on this finding appear in the list.
If nothing matches your filters, click Clear Filters to see the full history again.
View long text, photos, and videos
Long text: Long Description, Internal Notes, and Recommendation/Solution values are shortened in the table. Hover over the value and click View Full Text to see the before-and-after text in full.

Photos and videos: Hover over an attachment's file name and click View Image or View Video to preview it. From the preview, you can open the full image or video.
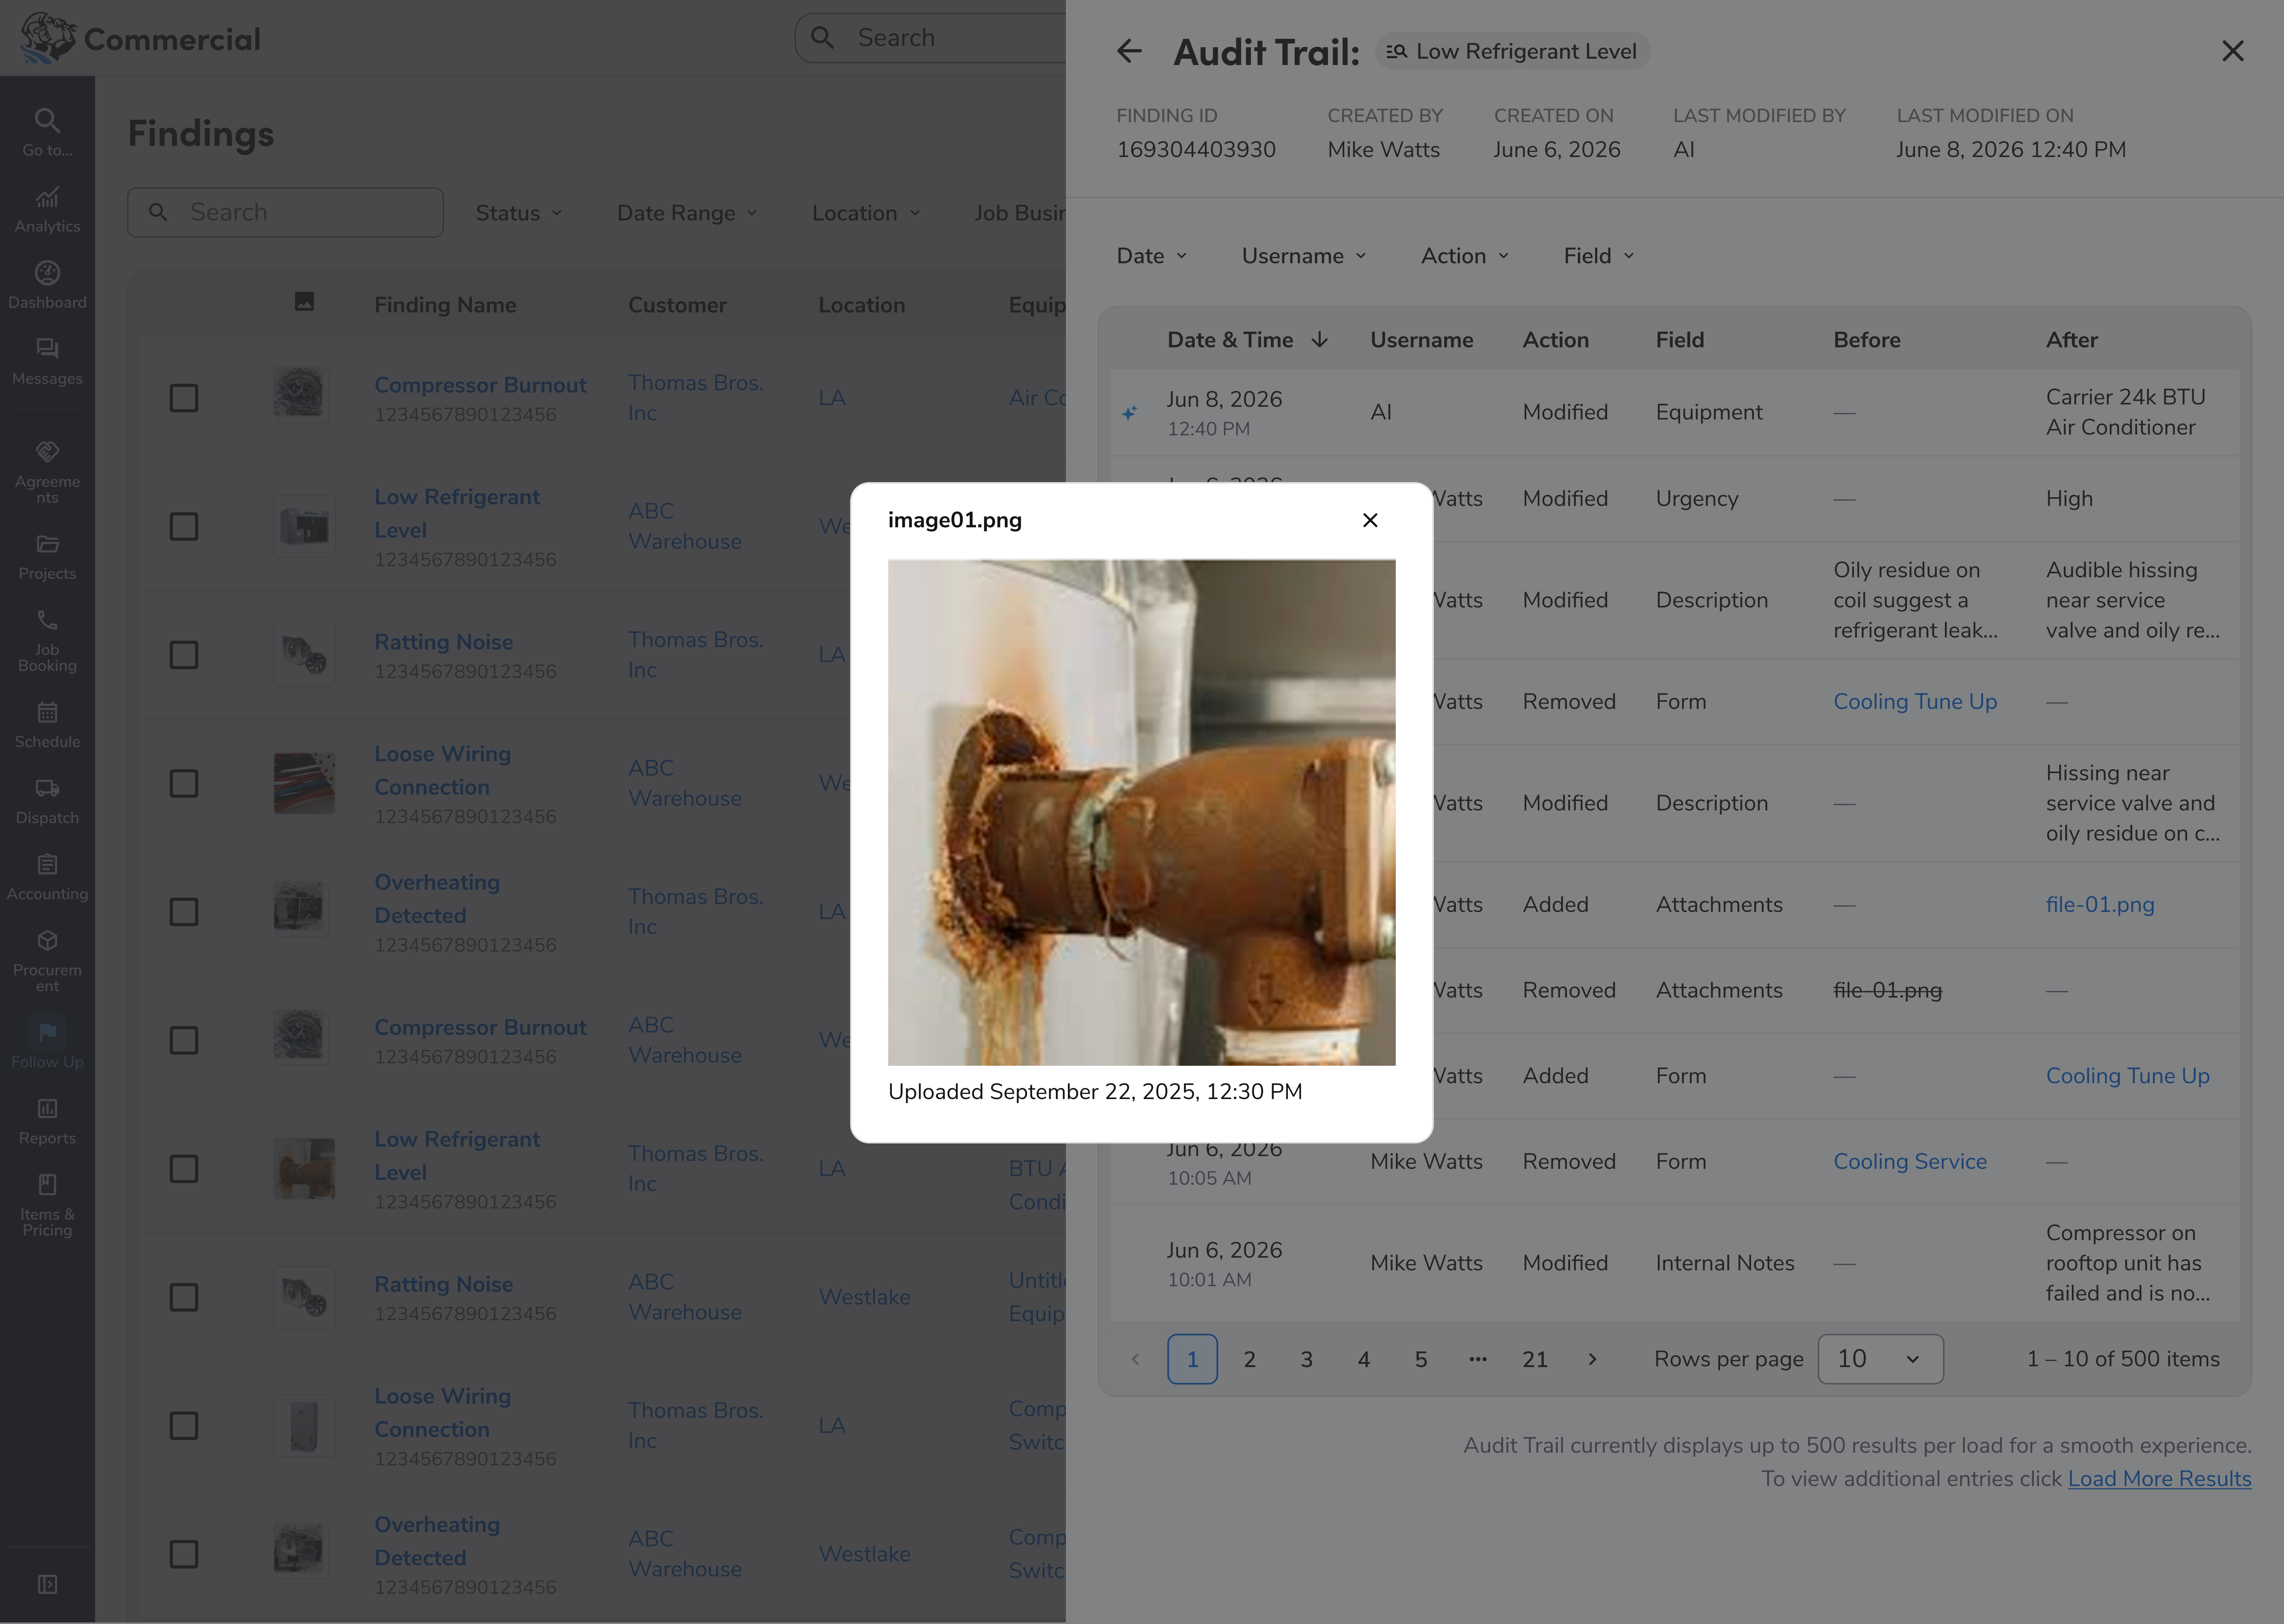
If an attachment's file is no longer available, the table shows Content not available.